Introduction
This post is intended to document the process of installing Oracle Enterprise Manager Cloud Control 12c Release 3 on Oracle Linux 6.
Licensing
OEM Cloud Control is used as a centralised management point for Oracle Database installations in your environment.
You can install this for free and use the base functionalities for free as long as you have an active support subscription with Oracle for any targets (database, hosts, etc.) you want to manage.
The list of the base functionalities you can use for free can be reviewed on the OEM Cloud Control Licensing Guide.
Server setup
First, we start with a minimal installation of Oracle Linux 6 with 8GB of RAM and 100GB hard disk. A swap space of 8GB is configured.
Install Oracle Database
OEM Cloud Control will use an Oracle Database to store OEM data, and this database will have to have been installed when you run the OEM Cloud Control installer. The OEM Cloud Control installer will not install the Oracle Database as part of the installation.
You may use an existing Oracle Database for this purpose or you can install a separate database specifically for it.
From the Licensing Guide:
Enterprise Manager includes a restricted-use license of the Oracle Database for use only with the Oracle Management Repository or other complementary repositories included with Enterprise Manager (such as, Ops Center, Real User Experience Insight, Load Testing, and Test Manager).
Additional database options or additional servers for disaster recovery require separate licensing. Customers receive one single-instance database with the Cloud Control, or RMAN, repository. To protect the repository with Data Guard, customers need to purchase a license for the standby site. To protect the repository with Oracle Real Application Clusters, customers must license the second node for the database, and both nodes require an Oracle Real Application Clusters license.
As long as you use a single-instance installation of Oracle Database and do not use this database for anything other than OEM, the database is considered properly licensed.
Prep the server for Oracle Database installation
Funnily enough, at the time of writing, the highest version of Oracle Database certified to be used as the OEM repository is 11gR2. 12c is not certified.
You can check the certifications via My Oracle Support by following the steps in the Installation Guide.
Now we install the 11gR2 pre-requisite RPM to prepare the server for Oracle Database installation.
[root@server ~]# yum install oracle-rdbms-server-11gR2-preinstall
The preinstall RPM will have added the oracle OS user, as well as the oinstall and dba OS groups.
Next, we create the directory structure to hold the Oracle Database files.
[root@server ~]# mkdir -p /u01/app/oracle
[root@server ~]# chown -R oracle:oinstall /u01
Get the Oracle Database installer from OTN, and copy the files into the server. Finally, unzip the installation files.
Perform Oracle Database Installation
Set up X forwarding, and run the installer as the oracle user.
[oracle@server ~]$ cd database
[oracle@server database]$ ./runInstaller
Choose to configure a database during installation.

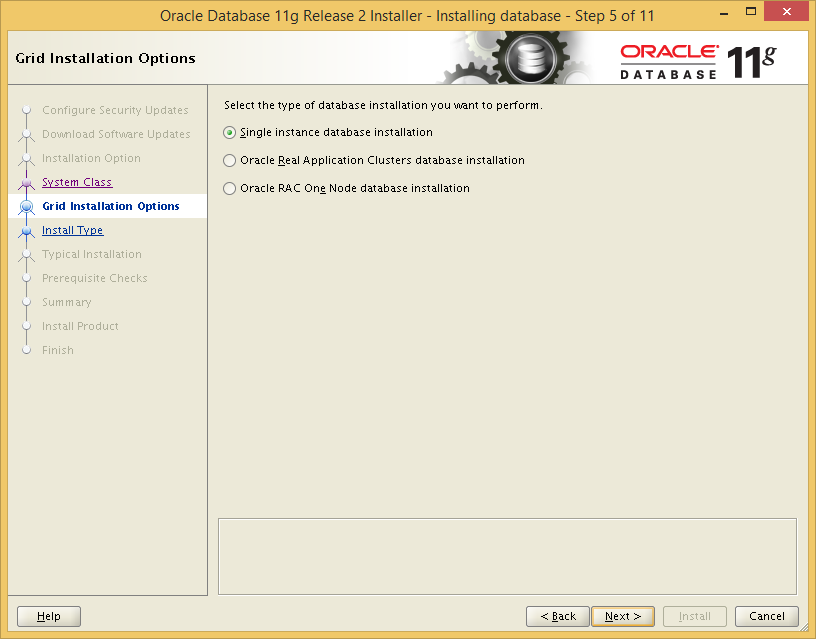
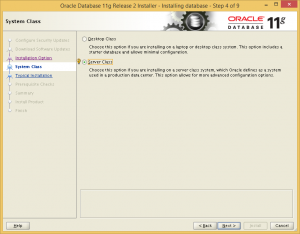
Choose a server class installation.
Choose single instance installation.

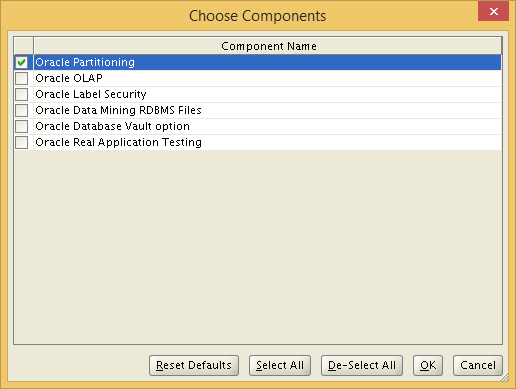
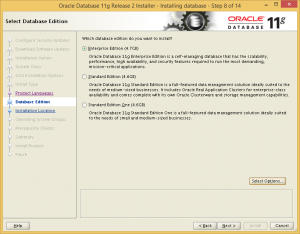
Choose Enterprise Edition, and de-select all options except Partitioning, which is required by OEM Cloud Control 12c. We remove all unnecessary options to avoid future trouble with Oracle Licensing.

Proceed with the rest of the installation as usual. Just accept all the defaults for the database configuration, as we will remove this database later and create a new one.
Create repository instance
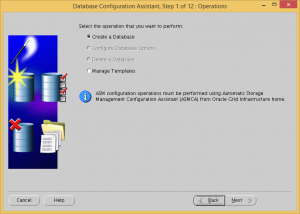
After the installation has completed, run the Database Configuration Assistant (DBCA) and remove the instance configured during the database installation.
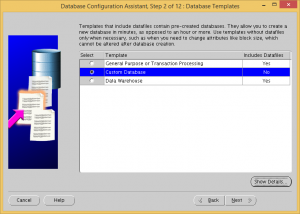
Then use DBCA to create a new instance from scratch. Using any of the seed databases supplied by Oracle will not do as the database for the OEM repository should not have the SYSMAN schema present.
The settings for the new database should match your expected deployment size. Refer to the Advanced Installation and Configuration Guide for sizing guide. For this article, I will be using the SMALL deployment size, which have the following settings for the repository database:
| Parameter |
Minimum Value |
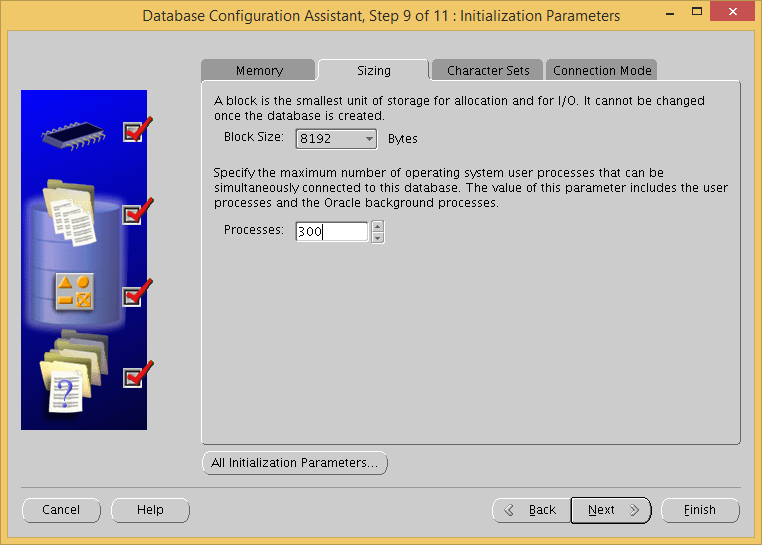
| processes |
300 |
| pga_aggregate_target* |
1024 MB |
| sga_target* |
2 GB |
| redo log file size |
300 MB |
| shared_pool_size |
600 MB |
| *memory_target of 3 GB can be used in place of sga_target and pga_aggregate_target |
We can now begin creating the database using DBCA.
Choose to create a database.
Choose to create a custom database.
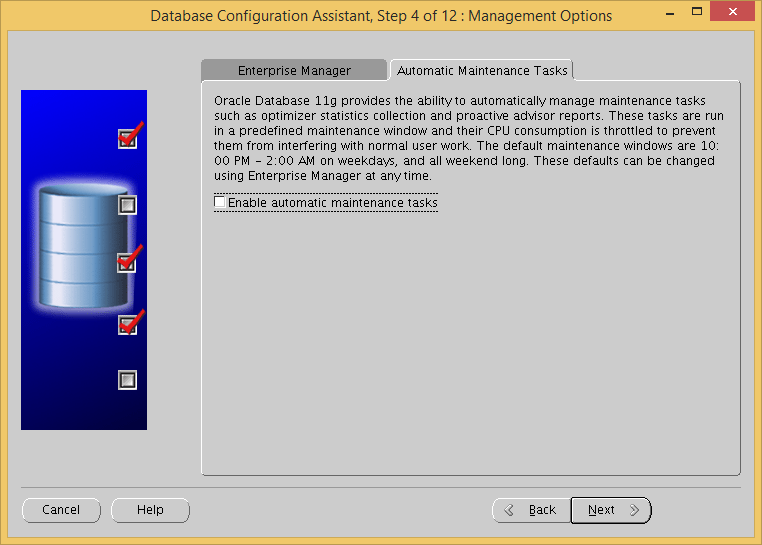
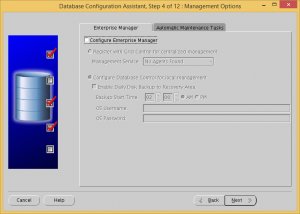
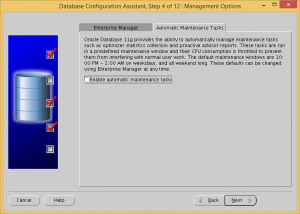
Uncheck the Configure Enterprise Manager and Enable automatic maintenance tasks checkboxes.
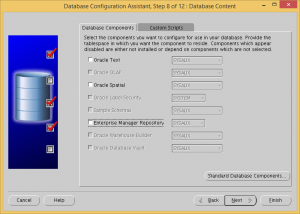
Remove all the optional database components

Check the Use Automatic Memory Management checkbox and make sure the memory size is more than 3 GB.
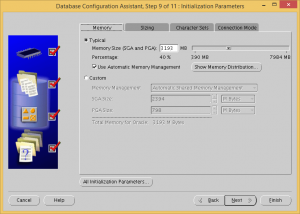
Set processes to 300.

Change all three redo log file sizes to 300 MB.
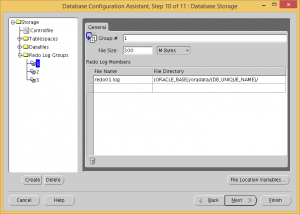
Complete the database creation.
Install Oracle Enterprise Manager Cloud Control 12c Release 3
With the repository database ready, it is time to install the OEM proper.
Review package requirements.
First, review the operating system package requirements from the Installation Guide.
For my installation, since the oracle-rdbms-server-11gR2-preinstall package was already installed, the only missing package is the glibc-devel 32-bit package. So, that will now be installed using yum.
[root@server ~]# yum install glibc-devel.i686
Next, get the installer from OTN.
Unzip the files, and run the installer as the oracle user.
[oracle@server oem]$ ./runInstaller
Configure the email and software updates if you want to, and click Next.
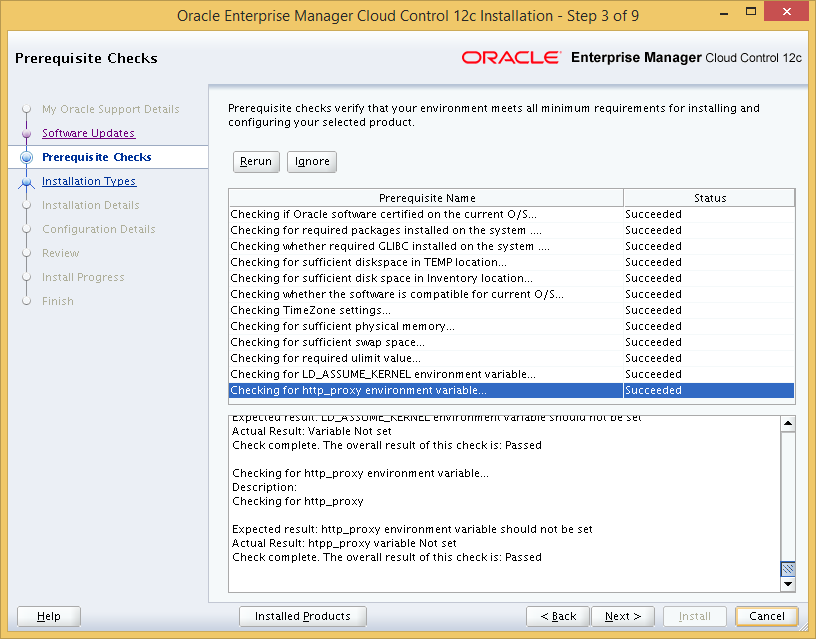
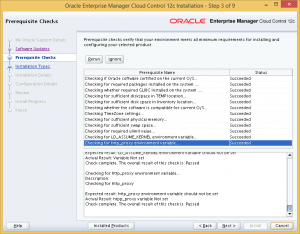
The pre-requisite checks will be performed, and in my case, all the tests were successful.
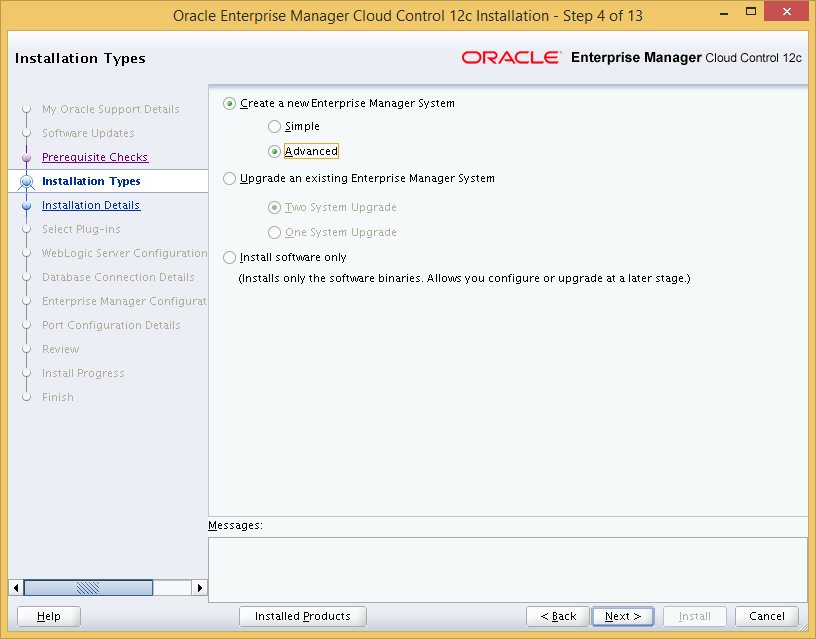
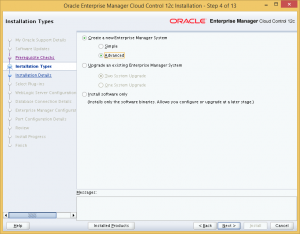
Choose to create a new Advanced Enterprise Manager System.
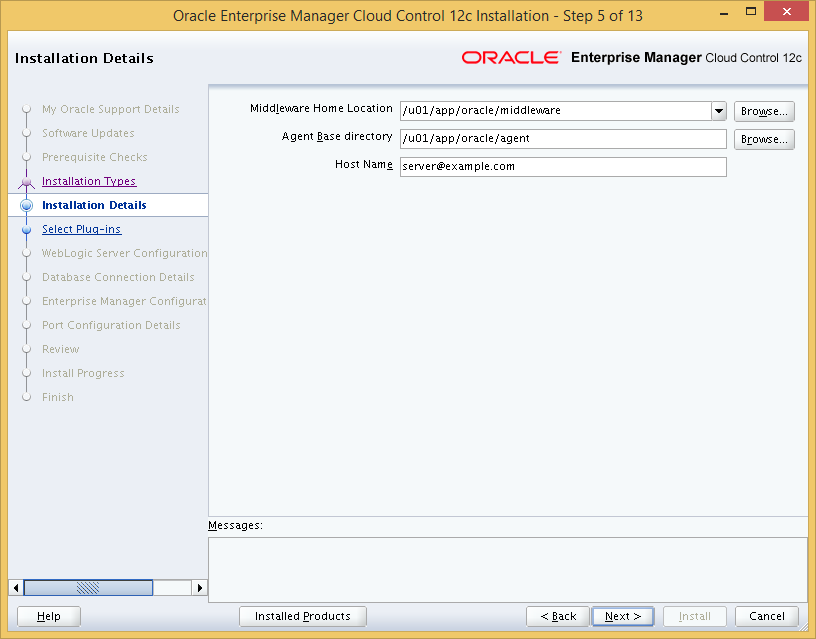
Next, specify the location to install the Middleware and Agent components of OEM Cloud Control. I chose to use the ORACLE_BASE of the database installation as the base directory, with directories for the Middleware and Agent components located in this base.

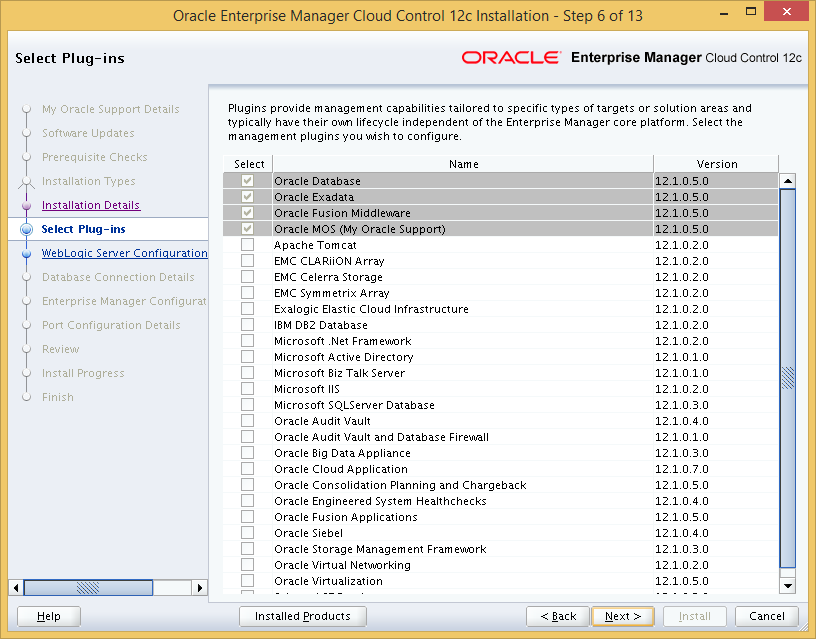
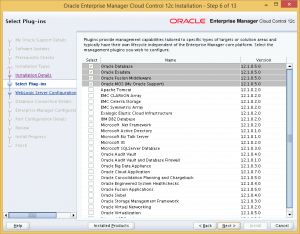
The next page we will be able to choose which management plugins we wish to install. For my install, I will only use OEM Cloud Control to manage Oracle Databases. Therefore, I will not install any additional plugins.
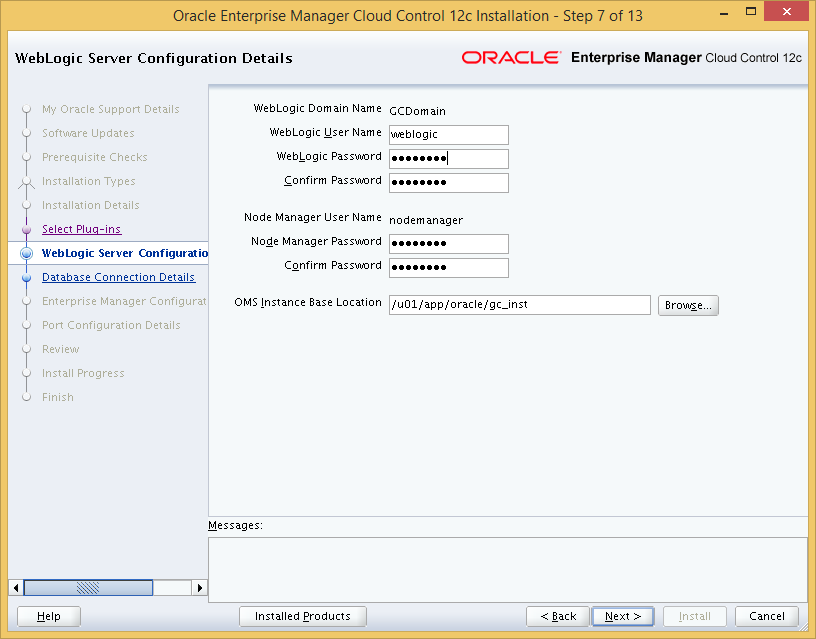
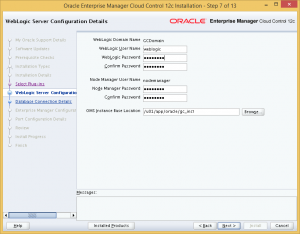
Next, provide passwords WebLogic and Node Manager, and specify installation directory for OMS. Again, I used the same directory structure as the Oracle Database installation.
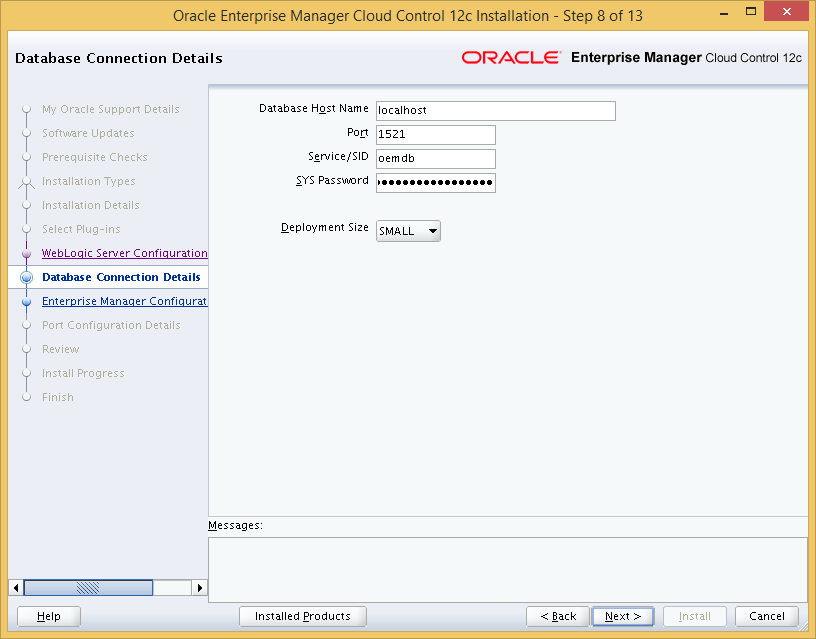
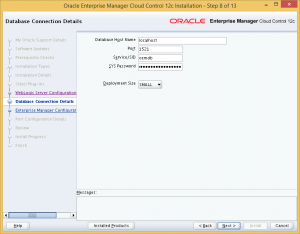
Step 8: Provide the details of the repository database. Here we insert the details of the repository database which we have installed earlier, and select the corresponding deployment size.
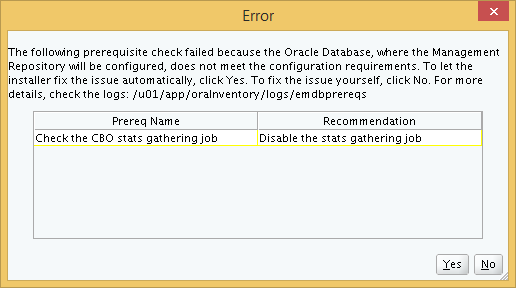
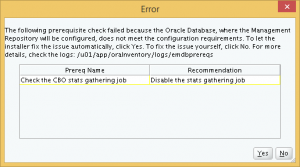
When I clicked Next, an error popped out saying that a CBO statistics collection job must be disabled. The installer offered to fix this automatically, and I accept.
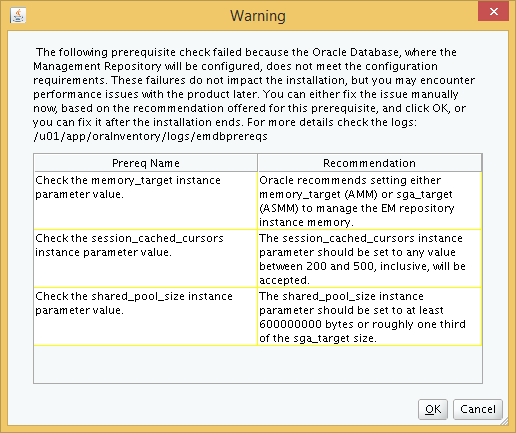
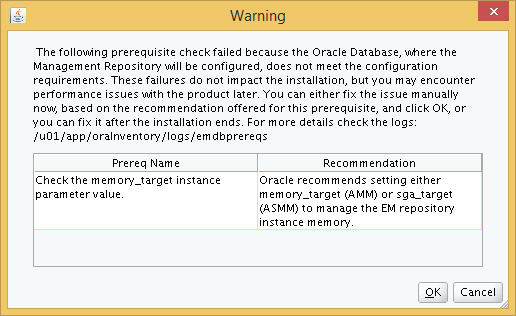
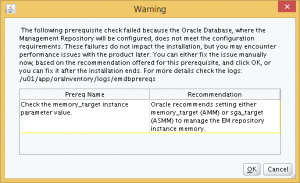
After clicking Yes, the installer presented me with several warnings regarding database parameter mis-matches that will affect the performance of the OEM Cloud Control. I can choose to fix them now, or proceed with the installation and fix them later.
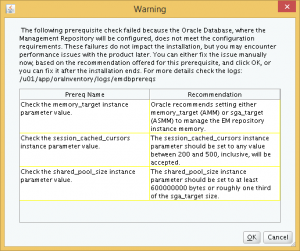
The first warning is about the memory_target parameter. However, checking the parameter shows that the parameter is set up correctly for the SMALL deployment size.
SQL> show parameter memory_target

NAME                                 TYPE        VALUE
------------------------------------ ----------- ------------------------------
memory_target                        big integer 3200M
The second warning is for the session_cached_cursors parameter. Change this to the recommended value. This parameter is not changeable online, so a database restart is required.
SQL> show parameter session_cached_cursors

NAME                                 TYPE        VALUE
------------------------------------ ----------- ------------------------------
session_cached_cursors               integer     50

SQL> alter system set session_cached_cursors=500 scope=SPFILE;

System altered.

SQL> shutdown immediate
Database closed.
Database dismounted.
ORACLE instance shut down.
SQL> startup
ORACLE instance started.

Total System Global Area 3340451840 bytes
Fixed Size                  2257840 bytes
Variable Size            1811942480 bytes
Database Buffers         1509949440 bytes
Redo Buffers               16302080 bytes
Database mounted.
Database opened.
SQL> show parameter session_cached_cursors;

NAME                                 TYPE        VALUE
------------------------------------ ----------- ------------------------------
session_cached_cursors               integer     500
The third and final change is to the shared_pool_size parameter.
SQL> show parameter shared_pool_size

NAME                                 TYPE        VALUE
------------------------------------ ----------- ------------------------------
shared_pool_size                     big integer 0
SQL> alter system set shared_pool_size=600M scope=both;

System altered.

SQL> show parameter shared_pool_size

NAME                                 TYPE        VALUE
------------------------------------ ----------- ------------------------------
shared_pool_size                     big integer 608M
Now, we return to the installer and click Cancel and re-run the database check. Now, only one warning appears, which I guess is an installer glitch in reading the memory parameter. Click Ok to resume with the installation.
Step 9: On this page of the installer, we specify the passwords for SYSMAN and registration. This SYSMAN password will be used in the initial login to the OEM Cloud Control. You can change the default locations of the tablespaces to be created, and also the location of the software library to be used by OEM Cloud Control.

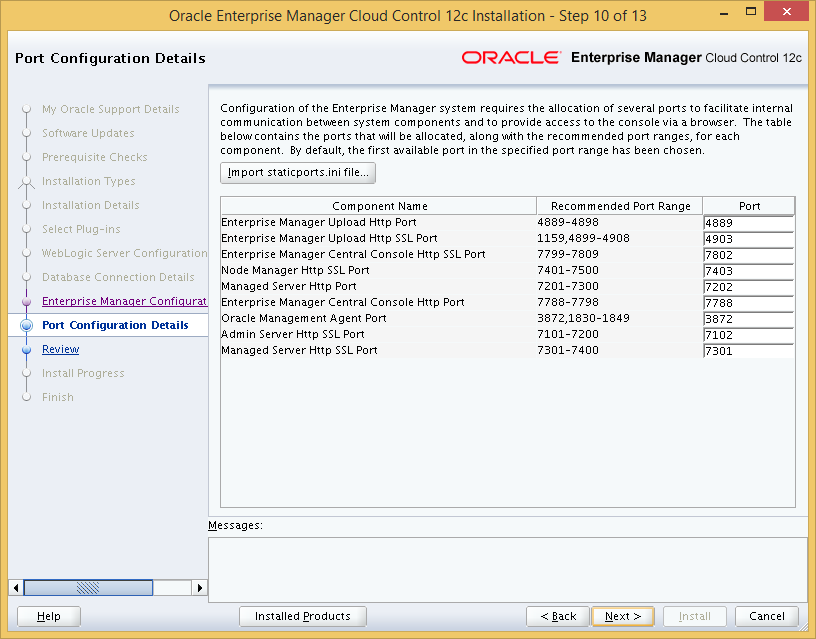
Step 10: Review the port assignments for OEM Cloud Control, or change them if you wish.

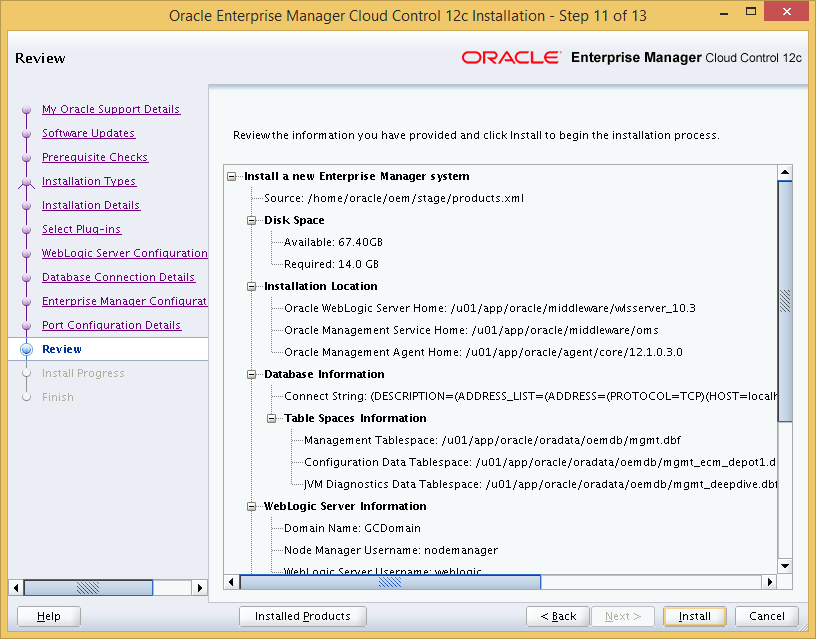
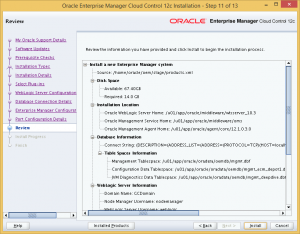
Step 11: Finally, we get to the review page. Click Install to begin OEM Cloud Control installation.
The installer will prompt for execution of root scripts. Run the script.
[root@server ~]# /u01/app/oracle/middleware/oms/allroot.sh

Starting to execute allroot.sh .........

Starting to execute /u01/app/oracle/middleware/oms/root.sh ......
Running Oracle 11g root.sh script...

The following environment variables are set as:
    ORACLE_OWNER= oracle
    ORACLE_HOME=  /u01/app/oracle/middleware/oms

Enter the full pathname of the local bin directory: [/usr/local/bin]: <Press Enter>
The file "dbhome" already exists in /usr/local/bin.  Overwrite it? (y/n)
[n]:<Press Enter>
The file "oraenv" already exists in /usr/local/bin.  Overwrite it? (y/n)
[n]:<Press Enter>
The file "coraenv" already exists in /usr/local/bin.  Overwrite it? (y/n)
[n]:<Press Enter>

Entries will be added to the /etc/oratab file as needed by
Database Configuration Assistant when a database is created
Finished running generic part of root.sh script.
Now product-specific root actions will be performed.
/etc exist

Creating /etc/oragchomelist file...
/u01/app/oracle/middleware/oms
Finished execution of  /u01/app/oracle/middleware/oms/root.sh ......


Starting to execute /u01/app/oracle/agent/core/12.1.0.3.0/root.sh ......
Finished product-specific root actions.
/etc exist
Finished execution of  /u01/app/oracle/agent/core/12.1.0.3.0/root.sh ......
The installation is now completed.
Configure firewall for OEM Cloud Control
Now we we will need to configure the firewall to enable OEM Cloud Control to work properly. Of course, you can disable the firewall instead should you choose to.
Check the Port List
First, check the list of ports used by your installation. This list can be located inside your middleware installation directory <path_to_middleware>/oms/install/portlist.ini.
[root@server ~]# cat /u01/app/oracle/middleware/oms/install/portlist.ini
Enterprise Manager Upload Http Port=4889
Enterprise Manager Upload Http SSL Port=4903
Enterprise Manager Central Console Http SSL Port=7802
Node Manager Http SSL Port=7403
Managed Server Http Port=7202
Enterprise Manager Central Console Http Port=7788
Oracle Management Agent Port=3872
Admin Server Http SSL Port=7102
Managed Server Http SSL Port=7301
Configure Firewall
Next, configure the firewall to allow incoming connections from all the ports listed above.
[root@server ~]# iptables -I INPUT 5 -m state --state NEW -p tcp --dport 4889 -j ACCEPT
[root@server ~]# iptables -I INPUT 6 -m state --state NEW -p tcp --dport 4903 -j ACCEPT
[root@server ~]# iptables -I INPUT 7 -m state --state NEW -p tcp --dport 7802 -j ACCEPT
[root@server ~]# iptables -I INPUT 8 -m state --state NEW -p tcp --dport 7403 -j ACCEPT
[root@server ~]# iptables -I INPUT 9 -m state --state NEW -p tcp --dport 7202 -j ACCEPT
[root@server ~]# iptables -I INPUT 10 -m state --state NEW -p tcp --dport 7788 -j ACCEPT
[root@server ~]# iptables -I INPUT 11 -m state --state NEW -p tcp --dport 3872 -j ACCEPT
[root@server ~]# iptables -I INPUT 12 -m state --state NEW -p tcp --dport 7102 -j ACCEPT
[root@server ~]# iptables -I INPUT 13 -m state --state NEW -p tcp --dport 7301 -j ACCEPT
[root@server ~]# service iptables save
iptables: Saving firewall rules to /etc/sysconfig/iptables:[  OK  ]
Login to OEM Cloud Control
Now, we are ready to login for the first time to the OEM Cloud Control installation. Open up a browser and go to the following URL:
https://server:<port>/em
The port should be the port listed for Enterprise Manager Central Console Http SSL Port in the portlist.ini file that we checked earlier.
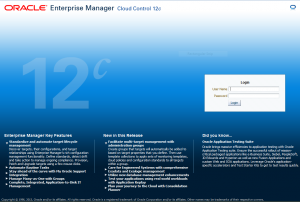
Login with username SYSMAN and the password for SYSMAN that was set during the OEM Cloud Control installation earlier.
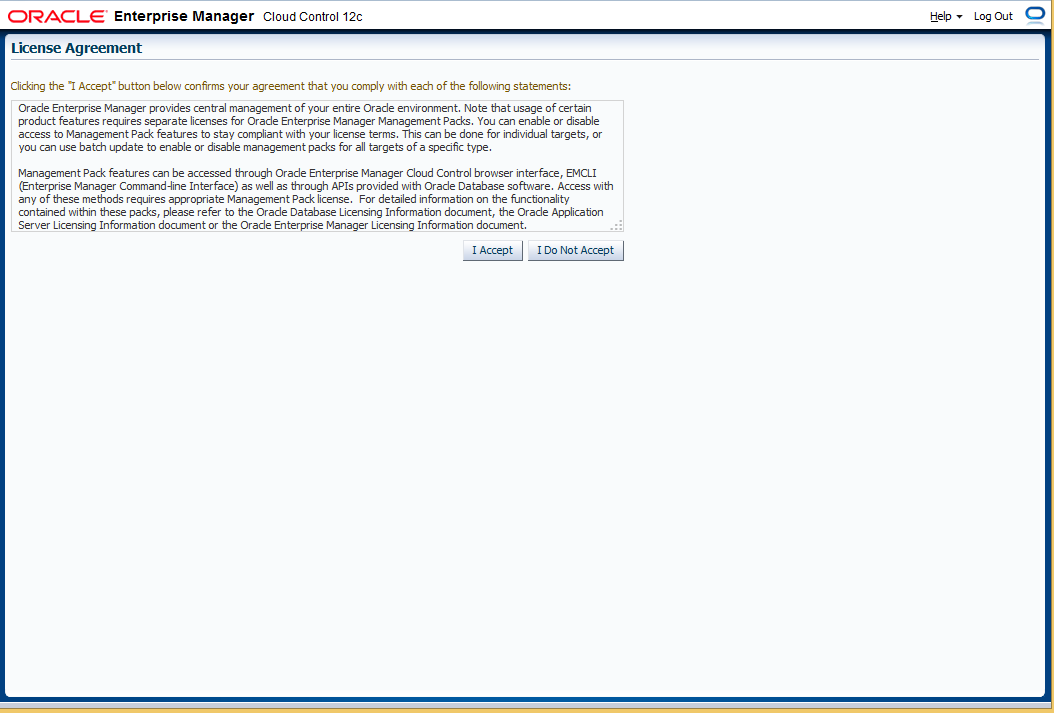
You will be presented with a License Agreement Page.
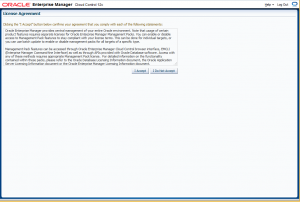
Read the license agreement and click I Accept.
You will now be presented with the Welcome Page. You can now start using OEM Cloud Control 12c.