The purpose of this post is to document the steps to set up WordPress on a server.
The server operating system is going to be CentOS which currently is my preferred server operating system.
The final objective is to have a WordPress website accessible via wordpress.hazrulnizam.com.
Perform operating system installation
First of all, the latest version of CentOS, which is 6.4, is installed on the server and the server is given the hostname server.hazrulnizam.com. A minimal install is chosen to prevent unwanted programs to be installed, which can both be a security risk and a waste of disk space.
A non-root user is then created.
[root@server ~]# useradd hnizam
[root@server ~]# passwd hnizam
Changing password for user hnizam.
New password:<type password here>
Retype new password:<re-type password here>
passwd: all authentication tokens updated successfully.
This user is then given sudo permissions.
[root@server ~]# vi /etc/sudoers
## Next comes the main part: which users can run what software on
## which machines (the sudoers file can be shared between multiple
## systems).
## Syntax:
##
##      user    MACHINE=COMMANDS
##
## The COMMANDS section may have other options added to it.
##
## Allow root to run any commands anywhere
root    ALL=(ALL)       ALL
hnizam  ALL=(ALL)       NOPASSWD: ALL
This user is going to be used for all subsequent commands, to limit exposure on the root account.
The OS is then updated to the latest version.
[hnizam@server ~]$ sudo yum check-update

[hnizam@server ~]$ sudo yum upgrade

[hnizam@server ~]$ sudo shutdown -ry now
Check WordPress requirements
Now that the operating system is properly set up, it is time to begin the process of installing WordPress. First, the requirements for installing WordPress should be reviewed. At the time of writing, the current version of WordPress is 3.7.1 and according to the WordPress requirements page, the requirements for installing WordPress are:
- PHP version 5.2.4 or greater
- MySQL version 5.0 or greater
- Web server capable of supporting the above (Apache or Nginx is recommended)
To enable pretty permalinks, the Apache module mod_rewrite is needed.
Apache is being chosen as the web server for this particular case as it is one of the earliest web servers and also one of the most used web server software.
Install web server (Apache)
Install the Apache software
The package group feature of the yum package manager is used to install the Apache web server software.
[hnizam@server ~]$ sudo yum grouplist | grep -i web
   Web Server
   Web Servlet Engine
   Web-Based Enterprise Management
[hnizam@server ~]$ sudo yum groupinstall "Web Server"
The Apache web server is installed as the httpd service. The chkconfig command is used to enable the httpd service at server boot-up.
[hnizam@server ~]$ sudo chkconfig httpd --list
httpd           0:off   1:off   2:off   3:off   4:off   5:off   6:off
[hnizam@server ~]$ sudo chkconfig httpd on
[hnizam@server ~]$ sudo chkconfig httpd --list
httpd           0:off   1:off   2:on    3:on    4:on    5:on    6:off
Next, the Apache web server is started, and the ports used by the web server (port 80 for http and port 443 for https) is opened at the firewall to enable the web server to be accessed by the public.
[hnizam@server ~]$ sudo service httpd start
Starting httpd:                                            [  OK  ]
[hnizam@server ~]$ sudo iptables -L -vn
Chain INPUT (policy ACCEPT 0 packets, 0 bytes)
 pkts bytes target     prot opt in     out     source               destination
 1930  156K ACCEPT     all  --  *      *       0.0.0.0/0            0.0.0.0/0           state RELATED,ESTABLISHED
    3   236 ACCEPT     icmp --  *      *       0.0.0.0/0            0.0.0.0/0
    0     0 ACCEPT     all  --  lo     *       0.0.0.0/0            0.0.0.0/0
    1    60 ACCEPT     tcp  --  *      *       0.0.0.0/0            0.0.0.0/0           state NEW tcp dpt:22
   98 26516 REJECT     all  --  *      *       0.0.0.0/0            0.0.0.0/0           reject-with icmp-host-prohibited

Chain FORWARD (policy ACCEPT 0 packets, 0 bytes)
 pkts bytes target     prot opt in     out     source               destination
    0     0 REJECT     all  --  *      *       0.0.0.0/0            0.0.0.0/0           reject-with icmp-host-prohibited

Chain OUTPUT (policy ACCEPT 1317 packets, 168K bytes)
 pkts bytes target     prot opt in     out     source               destination
[hnizam@server ~]$ sudo iptables -I INPUT 5 -m state --state NEW -p tcp --dport 80 -j ACCEPT
[hnizam@server ~]$ sudo iptables -I INPUT 6 -m state --state NEW -p tcp --dport 443 -j ACCEPT
[hnizam@server ~]$ sudo iptables -L -vn
Chain INPUT (policy ACCEPT 0 packets, 0 bytes)
 pkts bytes target     prot opt in     out     source               destination
 2277  186K ACCEPT     all  --  *      *       0.0.0.0/0            0.0.0.0/0           state RELATED,ESTABLISHED
    3   236 ACCEPT     icmp --  *      *       0.0.0.0/0            0.0.0.0/0
    0     0 ACCEPT     all  --  lo     *       0.0.0.0/0            0.0.0.0/0
    1    60 ACCEPT     tcp  --  *      *       0.0.0.0/0            0.0.0.0/0           state NEW tcp dpt:22
    0     0 ACCEPT     tcp  --  *      *       0.0.0.0/0            0.0.0.0/0           state NEW tcp dpt:80
    0     0 ACCEPT     tcp  --  *      *       0.0.0.0/0            0.0.0.0/0           state NEW tcp dpt:443
  108 29500 REJECT     all  --  *      *       0.0.0.0/0            0.0.0.0/0           reject-with icmp-host-prohibited

Chain FORWARD (policy ACCEPT 0 packets, 0 bytes)
 pkts bytes target     prot opt in     out     source               destination
    0     0 REJECT     all  --  *      *       0.0.0.0/0            0.0.0.0/0           reject-with icmp-host-prohibited

Chain OUTPUT (policy ACCEPT 5 packets, 920 bytes)
 pkts bytes target     prot opt in     out     source               destination
[hnizam@server ~]$ sudo service iptables save
iptables: Saving firewall rules to /etc/sysconfig/iptables:[  OK  ]
Post-installation checks
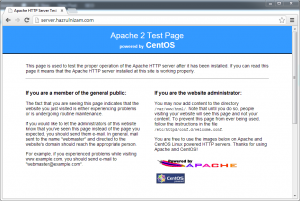
At this point, the URLs http://server.hazrulnizam.com and https://server.hazrulnizam.com should be accessible, and the default CentOS Apache welcome page is shown when these URLs are opened in a browser.
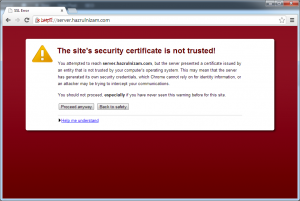
For the https page, the browser will show a certificate error, because the SSL certificate used by the default Apache installation is a self-signed certificate based on the hostname of the system.
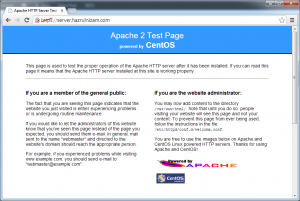
The certificate error should be ignored as it is the expected behavior. To make SSL work without the browser showing a certificate error will require acquiring a certificate from a certificate authority like VeriSign or Comodo, which is outside the scope of this post. A welcome page similar to the one from the http page is shown after the certificate error is ignored:
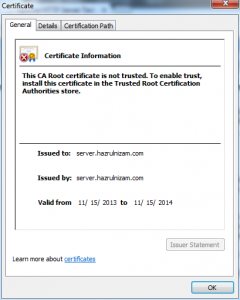
The details of the self-signed certificate is shown when the padlock with the red cross is clicked and then ‘Certificate information’ is clicked. Notice that the ‘Issued to:’ and ‘Issued by:’ fields are the same, which confirms that it is a self-signed certificate.
Install database server (MySQL)
Now that the web server has been successfully installed, it is time to install the database server.
Install the MySQL software
The method used to install MySQL is the same as the method used to install Apache, which is via yum.
[hnizam@server ~]$ sudo yum grouplist | grep -i mysql
   MySQL Database client
   MySQL Database server
[hnizam@server ~]$ sudo yum groupinstall "MySQL Database server"
The MySQL database server is installed as the mysqld service. The chkconfig command is used to enable the mysqld service at server boot-up.
[hnizam@server ~]$ sudo chkconfig mysqld --list
mysqld          0:off   1:off   2:off   3:off   4:off   5:off   6:off
[hnizam@server ~]$ sudo chkconfig mysqld on
[hnizam@server ~]$ sudo chkconfig mysqld --list
mysqld          0:off   1:off   2:on    3:on    4:on    5:on    6:off
Next, the mysqld service is started for the first time.
[hnizam@server ~]$ sudo service mysqld start
Initializing MySQL database:  Installing MySQL system tables...
OK
Filling help tables...
OK

To start mysqld at boot time you have to copy
support-files/mysql.server to the right place for your system

PLEASE REMEMBER TO SET A PASSWORD FOR THE MySQL root USER !
To do so, start the server, then issue the following commands:

/usr/bin/mysqladmin -u root password 'new-password'
/usr/bin/mysqladmin -u root -h server.hazrulnizam.com password 'new-password'

Alternatively you can run:
/usr/bin/mysql_secure_installation

which will also give you the option of removing the test
databases and anonymous user created by default.  This is
strongly recommended for production servers.

See the manual for more instructions.

You can start the MySQL daemon with:
cd /usr ; /usr/bin/mysqld_safe &

You can test the MySQL daemon with mysql-test-run.pl
cd /usr/mysql-test ; perl mysql-test-run.pl

Please report any problems with the /usr/bin/mysqlbug script!

                                                           [  OK  ]
Starting mysqld:                                           [  OK  ]
Post-installation tasks
Now that the MySQL database server is installed and running, it is time to run the secure installation command as per advised by the MySQL first-time-start script. The command offers to change the MySQL root password, remove anonymous user access to the MySQL database, and several other changes to help secure the database.
[hnizam@server ~]$ sudo /usr/bin/mysql_secure_installation

NOTE: RUNNING ALL PARTS OF THIS SCRIPT IS RECOMMENDED FOR ALL MySQL
      SERVERS IN PRODUCTION USE!  PLEASE READ EACH STEP CAREFULLY!

In order to log into MySQL to secure it, we'll need the current
password for the root user.  If you've just installed MySQL, and
you haven't set the root password yet, the password will be blank,
so you should just press enter here.

Enter current password for root (enter for none): <Enter>
OK, successfully used password, moving on...

Setting the root password ensures that nobody can log into the MySQL
root user without the proper authorisation.

Set root password? [Y/n] Y
New password: mysqlrootpassword
Re-enter new password: mysqlrootpassword
Password updated successfully!
Reloading privilege tables..
 ... Success!

By default, a MySQL installation has an anonymous user, allowing anyone
to log into MySQL without having to have a user account created for
them.  This is intended only for testing, and to make the installation
go a bit smoother.  You should remove them before moving into a
production environment.

Remove anonymous users? [Y/n] Y
 ... Success!

Normally, root should only be allowed to connect from 'localhost'.  This
ensures that someone cannot guess at the root password from the network.

Disallow root login remotely? [Y/n] Y
 ... Success!

By default, MySQL comes with a database named 'test' that anyone can
access.  This is also intended only for testing, and should be removed
before moving into a production environment.

Remove test database and access to it? [Y/n] Y
 - Dropping test database...
 ... Success!
 - Removing privileges on test database...
 ... Success!

Reloading the privilege tables will ensure that all changes made so far
will take effect immediately.

Reload privilege tables now? [Y/n] Y
 ... Success!

Cleaning up...

All done!  If you've completed all of the above steps, your MySQL
installation should now be secure.

Thanks for using MySQL!
Install PHP
The next step is to install the PHP interpreter.
Install the PHP interpreter software.
Same as previously, the yum package manager is used to perform the installation.
[hnizam@server ~]$ sudo yum grouplist | grep -i php
   PHP Support
[hnizam@server ~]$ sudo yum groupinstall "PHP Support"
To be able to set up WordPress properly, the PHP-MySQL extension must also be installed.
[hnizam@server ~]$ sudo yum install php-mysql
Test PHP installation
To test whether the PHP interpreter is working correctly, first the web server needs to be restarted.
[hnizam@server ~]$ sudo service httpd restart
Stopping httpd:                                            [  OK  ]
Starting httpd:                                            [  OK  ]
Next, a test file containing the phpinfo() function is created in the web server root directory.
[hnizam@server ~]$ sudo vi /var/www/html/test.php
<?php
phpinfo();
?>
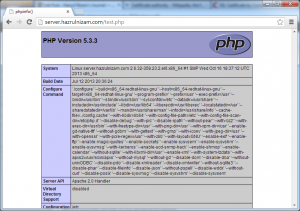
Now when the browser is set to http://server.hazrulnizam.com/test.php or https://server.hazrulnizam.com/test.php, a page with a lot of details about the system is shown similar to the screenshot below.
This indicates that the PHP installation is successful and that the PHP interpreter is working correctly with the web server.
The test file is then deleted.
[hnizam@server ~]$ sudo rm /var/www/html/test.php
Install and set up WordPress
With all the prerequisites now installed, it is time to install and set up WordPress itself, using the installation guide from the WordPress.org website.
Create the database and database user
A new database is created inside the installed MySQL database server to be used by WordPress and a new database user that owns the privileges to the new database is also created.
[hnizam@server ~]$ mysql -u root -p
Enter password: mysqlrootpassword
Welcome to the MySQL monitor.  Commands end with ; or \g.
Your MySQL connection id is 10
Server version: 5.1.69 Source distribution

Copyright (c) 2000, 2013, Oracle and/or its affiliates. All rights reserved.

Oracle is a registered trademark of Oracle Corporation and/or its
affiliates. Other names may be trademarks of their respective
owners.

Type 'help;' or '\h' for help. Type '\c' to clear the current input statement.

mysql> create database wordpressdb;
Query OK, 1 row affected (0.00 sec)

mysql> grant all privileges on wordpressdb.* to "wordpressdbuser"@"localhost" identified by "wordpressdbpassword";
Query OK, 0 rows affected (0.00 sec)

mysql> flush privileges;
Query OK, 0 rows affected (0.00 sec)

mysql> exit
Bye
[hnizam@server ~]$
The above commands create a database named wordpressdb and a user named wordpressdbuser whose password is wordpressdbpassword. Any other names can be used for the database, username, and password if desired.
Download and extract the WordPress software
The latest version of the WordPress software is downloaded to the server using wget and then extracted using the tar command.
[hnizam@server ~]$ sudo yum install wget
[hnizam@server ~]$ wget http://wordpress.org/latest.tar.gz
[hnizam@server ~]$ tar -xzvf latest.tar.gz
The above commands result in an extracted folder named wordpress which contains the WordPress software.
[hnizam@server ~]$ ls -l
total 4492
-rw-rw-r--. 1 hnizam hnizam 4594818 Oct 30 04:08 latest.tar.gz
drwxr-xr-x. 5 hnizam hnizam    4096 Oct 30 04:08 wordpress
Copy extracted WordPress folder into www folder
The extracted folder is then copied into /var/www/ folder to ensure that the SELinux contexts are properly set for Apache web server. The WordPress site will be served by Apache from this location. Moving the folder using the mv command will preserve the SELinux contexts from the original location which is not what is desired. Therefore, the folder is copied using the cp command.
[hnizam@server ~]$ sudo cp -R wordpress /var/www/
Next, the owner of the WordPress folder is changed to the Apache user to enable the Apache web server to read and write to that folder.
[hnizam@server ~]$ sudo chown -R apache:apache /var/www/wordpress
Set up Apache virtual host
The Apache web server needs to be configured to make it use the directory above when a browser asks for http://wordpress.hazrulnizam.com or https://wordpress.hazrulnizam.com.
First, the httpd.conf file is modified.
[hnizam@server ~]$ sudo vi /etc/httpd/conf/httpd.conf
### Section 3: Virtual Hosts
#
# VirtualHost: If you want to maintain multiple domains/hostnames on your
# machine you can setup VirtualHost containers for them. Most configurations
# use only name-based virtual hosts so the server doesn't need to worry about
# IP addresses. This is indicated by the asterisks in the directives below.
#
# Please see the documentation at
# <URL:http://httpd.apache.org/docs/2.2/vhosts/>
# for further details before you try to setup virtual hosts.
#
# You may use the command line option '-S' to verify your virtual host
# configuration.

#
# Use name-based virtual hosting.
#
#NameVirtualHost *:80
NameVirtualHost *:80
NameVirtualHost *:443
#
# NOTE: NameVirtualHost cannot be used without a port specifier
# (e.g. :80) if mod_ssl is being used, due to the nature of the
# SSL protocol.
#

#
# VirtualHost example:
# Almost any Apache directive may go into a VirtualHost container.
# The first VirtualHost section is used for requests without a known
# server name.
#
#<VirtualHost *:80>
#    ServerAdmin webmaster@dummy-host.example.com
#    DocumentRoot /www/docs/dummy-host.example.com
#    ServerName dummy-host.example.com
#    ErrorLog logs/dummy-host.example.com-error_log
#    CustomLog logs/dummy-host.example.com-access_log common
#</VirtualHost>

<VirtualHost _default_:80>
    DocumentRoot "/var/www/html"
</VirtualHost>

<VirtualHost *:80>
    DocumentRoot "/var/www/wordpress"
    ServerName wordpress.hazrulnizam.com
    <Directory "/var/www/wordpress">
        Options FollowSymLinks
        AllowOverride All
    </Directory>
    ErrorLog logs/wordpress.hazrulnizam.com-error_log
    CustomLog logs/wordpress.hazrulnizam.com-access_log combined
</VirtualHost>
Next, the SSL key and certificate for the https site are generated.
[hnizam@server ~]$ openssl genrsa -out wordpress.key -des3 2048
Generating RSA private key, 2048 bit long modulus
................................................+++
......................................................................................................................................................................+++
e is 65537 (0x10001)
Enter pass phrase for wordpress.key: passphrase
Verifying - Enter pass phrase for wordpress.key: passphrase
[hnizam@server ~]$ openssl req -new -key wordpress.key -out wordpress.csr
Enter pass phrase for wordpress.key: passphrase
You are about to be asked to enter information that will be incorporated
into your certificate request.
What you are about to enter is what is called a Distinguished Name or a DN.
There are quite a few fields but you can leave some blank
For some fields there will be a default value,
If you enter '.', the field will be left blank.
-----
Country Name (2 letter code) [XX]:MY
State or Province Name (full name) []:Kuala Lumpur
Locality Name (eg, city) [Default City]:Kuala Lumpur
Organization Name (eg, company) [Default Company Ltd]:hazrulnizam.com
Organizational Unit Name (eg, section) []:wordpress
Common Name (eg, your name or your server's hostname) []:wordpress.hazrulnizam.com
Email Address []:

Please enter the following 'extra' attributes
to be sent with your certificate request
A challenge password []:
An optional company name []:
[hnizam@server ~]$ openssl x509 -req -days 365 -in wordpress.csr -signkey wordpress.key -out wordpress.crt
Signature ok
subject=/C=MY/ST=Kuala Lumpur/L=Kuala Lumpur/O=hazrulnizam.com/OU=wordpress/CN=wordpress.hazrulnizam.com
Getting Private key
Enter pass phrase for wordpress.key: passphrase
The generated key and certificate are then copied to their proper destinations to apply correct SELinux contexts on them. The read permissions are modified so that only the root user has access to them.
[hnizam@server ~]$ sudo cp wordpress.key /etc/pki/tls/private/
[hnizam@server ~]$ sudo chmod 600 /etc/pki//tls/private/wordpress.key
[hnizam@server ~]$ sudo cp wordpress.crt /etc/pki/tls/certs/
[hnizam@server ~]$ sudo chmod 600 /etc/pki//tls/certs/wordpress.crt
[hnizam@server ~]$ rm wordpress.crt wordpress.csr wordpress.key
Next, the virtual host configuration is added to the Apache SSL configuration file.
[hnizam@server ~]$ sudo vi /etc/httpd/conf.d/ssl.conf
<VirtualHost *:443>
    DocumentRoot "/var/www/wordpress"
    ServerName wordpress.hazrulnizam.com:443
    <Directory "var/www/wordpress">
        Options FollowSymLinks
        AllowOverride All
    </Directory>
    ErrorLog logs/wordpress.hazrulnizam.com-ssl_error_log
    CustomLog logs/wordpress.hazrulnizam.comssl_access_log combined
    LogLevel warn
    SSLEngine on
    SSLProtocol all -SSLv2
    SSLCipherSuite ALL:!ADH:!EXPORT:!SSLv2:RC4+RSA:+HIGH:+MEDIUM
    SSLCertificateFile /etc/pki/tls/certs/wordpress.crt
    SSLCertificateKeyFile /etc/pki/tls/private/wordpress.key
</VirtualHost>
The Apache web server is then restarted to load the new configurations.
[hnizam@server ~]$ sudo service httpd restart
Stopping httpd:                                            [  OK  ]
Starting httpd: Apache/2.2.15 mod_ssl/2.2.15 (Pass Phrase Dialog)
Some of your private key files are encrypted for security reasons.
In order to read them you have to provide the pass phrases.

Server wordpress.hazrulnizam.com:443 (RSA)
Enter pass phrase:passphrase

OK: Pass Phrase Dialog successful.
                                                           [  OK  ]
Notice that there is a prompt for the passphrase of the private key when Apache is starting up. This passphrase is going to be asked every time the Apache web server is started, including during server restarts. This can be avoided by using a private key that is not protected by a pass phrase (do not use the -des3 flag when creating the key using the openssl genrsa command). However, care must be taken to protect the key from being accessed by anyone else.
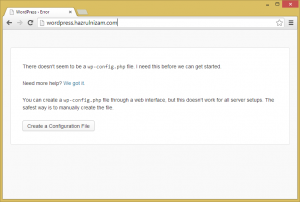
At this point, provided that the DNS entry for wordpress.hazrulnizam.com has been correctly added, pointing a browser to http://wordpress.hazrulnizam.com will show the following page:
This shows that Apache is correctly reading the WordPress files and together with the PHP interpreter is serving out dynamic PHP pages to the browser.
Enable WordPress to send emails
Before proceeding with the final step of WordPress installation, SELinux needs to be configured to allow WordPress to send emails out from the system. There are a few events that triggers WordPress to send notification emails such as when a new comment has been posted to a post.
The setsebool command is used to change the corresponding SELinux boolean to allow Apache, and in turn WordPress, to send out emails.
[hnizam@server ~]$ sudo getsebool httpd_can_sendmail
httpd_can_sendmail --> off
[hnizam@server ~]$ sudo setsebool httpd_can_sendmail on
[hnizam@server ~]$ sudo getsebool httpd_can_sendmail
httpd_can_sendmail --> on
Install and set up WordPress via the browser
The final step of installing WordPress involves creating a WordPress configuration file. This configuration file can either be manually created at the server, or can be created by WordPress itself via the browser. This post will continue via the browser method as all the prerequisites to make it successful has been performed above.
The URL http://wordpress.hazrulnizam.com is entered in the browser address bar.
The ‘Create a Configuration File’ button is then clicked.
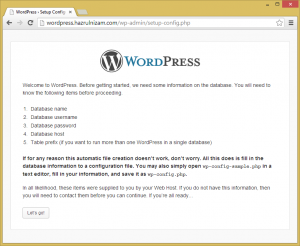
The next page shows that several information is needed to complete the installation such as database name, database username, database password, and database host. The corresponding information are the one used in the ‘Create the database and database user’ section above.
The ‘Let’s go’ button is then clicked.
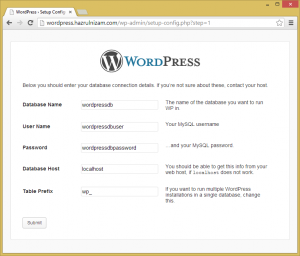
The Database Name is changed to wordpressdb, while User Name is changed to wordpressdbuser and Password is changed to wordpressdbpassword. The Database Host and Table Prefix fields are left at the default values.
The page is then submitted.
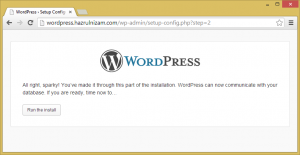
WordPress is now communicating correctly with the database. The ‘Run the install’ button is then clicked.
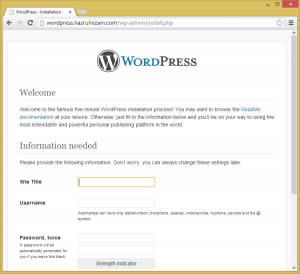
On this page, the Site Title, Username, Password and email address will have to be provided. The Site Title will be the title shown when the WordPress site is accessed once it is installed. The Username and Password are different than the database username and password. This will be the username that will be used to log in to the WordPress administration pages.
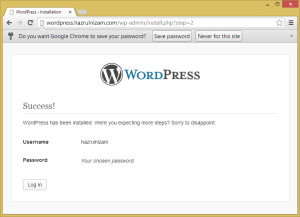
Once all the required fields are filled in and the ‘Install WordPress’ button pressed, the WordPress installation is completed and the website is now usable.
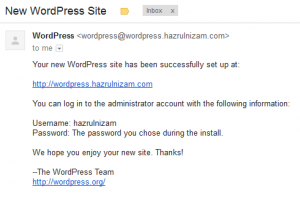
An email about the new WordPress website will also be sent to the email address specified on the install page.
This marks the end of the WordPress install.
Optional tasks
Force SSL on login and administration
The WordPress website is now working, but when you click ‘Log in’ from the main page, it will bring you to the http version of the login page. The username and password that you type will be sent in clear-text through the internet, making them vulnerable to anyone who would want to steal your password.
WordPress has a built-in feature to force logins and/or the administration pages to be served via https instead of http.
To enable this, edit the WordPress config file and add the following line near the end.
[hnizam@server wordpress]$ sudo vi wp-config.php
/**
 * For developers: WordPress debugging mode.
 *
 * Change this to true to enable the display of notices during development.
 * It is strongly recommended that plugin and theme developers use WP_DEBUG
 * in their development environments.
 */
define('WP_DEBUG', false);

define('FORCE_SSL_ADMIN', true);

/* That's all, stop editing! Happy blogging. */

/** Absolute path to the WordPress directory. */
if ( !defined('ABSPATH') )
        define('ABSPATH', dirname(__FILE__) . '/');

/** Sets up WordPress vars and included files. */
require_once(ABSPATH . 'wp-settings.php');
You can use FORCE_SSL_LOGIN instead of FORCE_SSL_ADMIN if you just want to protect the login page. The administration pages will not be served via https unless you specifically asks for the https protocol via the browser.
Enable pretty permalinks
One of the first things that should be done after a WordPress install is to enable pretty permalinks. The word-based URL will help the website to rank higher in search engine results compared to the default post ID URL.
Just go to the Settings > Permalinks via the administration pages, and choose Postname-based permalinks instead of the default. If you followed the install steps above, pretty permalinks should work correctly.
Install plugins and themes
One of the great things about WordPress is the abundance of plugins and themes that exist in the ecosystem. Use them to customize the website and to help in managing the website.
