Monthly Archives: May 2013

Monitoring ESXi 5.1 hosts using Zenoss (Part 1 – FAILED)

My Zenoss install has been working quite well, especially for monitoring Linux servers.  The /Server/Linux device class works great with net-snmp on Linux hosts.  Windows monitoring is also working very nicely with SNMP Informant as the agent.

The next challenge is to make Zenoss work with ESXi 5.1 hosts.  ESXi 5.1 has an SNMP agent installed, but no useful information can be grabbed using this agent.  We have to use the esxtop Zenpack to effectively monitor ESXi hosts.  This Zenpack will use the resxtop command instead of SNMP to fetch information.

The resxtop command has to be installed into the Zenoss server via installing the vSphere CLI.  The installation file can be downloaded from the VMware website.  As of the time of writing, the latest vCLI version is 5.1 U1.

I am using instructions from the Zenoss Core Extended Monitoring Guide.

First, install OpenSSL development package.

# yum install openssl-devel

Then, download the vCLI and unpack.

# tar xzvf VMware-vSphere-CLI-5.1.0-1060453.x86_64.tar.gz

Now, run the installer.

# cd vmware-vsphere-cli-distrib
# ./vmware-install.pl

....
CPAN module not installed on the system.
CPAN module is required to install missing pre-requisite Perl modules. Please
install CPAN.

Apparently, something called CPAN needs to be installed.  A yum search shows a package called perl-CPAN, so let’s install that, and restart the vCLI installation.

# yum install perl-CPAN

# ./vmware-install.pl
Please wait while configuring CPAN ...

Please wait while configuring perl modules using CPAN ...

CPAN is downloading and installing pre-requisite Perl module "Archive::Zip" .

CPAN is downloading and installing pre-requisite Perl module "Compress::Zlib" .

CPAN is downloading and installing pre-requisite Perl module
"Compress::Raw::Zlib" .

CPAN is downloading and installing pre-requisite Perl module "Crypt::SSLeay" .

CPAN is downloading and installing pre-requisite Perl module
"IO::Compress::Base" .

CPAN is downloading and installing pre-requisite Perl module
"IO::Compress::Zlib::Constants" .

CPAN is downloading and installing pre-requisite Perl module
"Class::MethodMaker" .

CPAN is downloading and installing pre-requisite Perl module "HTML::Parser" .

CPAN is downloading and installing pre-requisite Perl module "UUID" .

CPAN is downloading and installing pre-requisite Perl module "Data::Dump" .

CPAN is downloading and installing pre-requisite Perl module "SOAP::Lite" .

CPAN is downloading and installing pre-requisite Perl module "URI" .

CPAN is downloading and installing pre-requisite Perl module "XML::SAX" .

CPAN is downloading and installing pre-requisite Perl module
"XML::NamespaceSupport" .

CPAN is downloading and installing pre-requisite Perl module
"XML::LibXML::Common" .

CPAN is downloading and installing pre-requisite Perl module "XML::LibXML" .

CPAN is downloading and installing pre-requisite Perl module "LWP" .

CPAN is downloading and installing pre-requisite Perl module
"LWP::Protocol::https" .

CPAN not able to install following Perl modules on the system. These must be
installed manually for use by vSphere CLI:

Archive::Zip 1.28 or newer
Compress::Zlib 2.037 or newer
Compress::Raw::Zlib 2.037 or newer
Crypt::SSLeay 0.55 or newer
IO::Compress::Base 2.037 or newer
IO::Compress::Zlib::Constants 2.037 or newer
Class::MethodMaker 2.10 or newer
HTML::Parser 3.60 or newer
UUID 0.03 or newer
Data::Dump 1.15 or newer
SOAP::Lite 0.710.08 or newer
URI 1.37 or newer
XML::SAX 0.16 or newer
XML::NamespaceSupport 1.09 or newer
XML::LibXML::Common 0.13 or newer
XML::LibXML 1.63 or newer
LWP 5.805 or newer
LWP::Protocol::https 5.805 or newer

Oh boy.  I’ll figure this one out later.

Extending logical volume size on Ubuntu

One of the servers iscomplaining about a mount point being 90% full, and this must to be resolved.

The server is running Ubuntu, and it is using lvm.

First, check the mount points.

$ df -h
Filesystem            Size  Used Avail Use% Mounted on
/dev/mapper/vg00-lvvar
                      4.0G  3.6G  0.3G  91% /var

The logical volume resides in vg00.  Is there any space unallocated in the volume group?

$ sudo vgdisplay
  --- Volume group ---
  VG Name               vg00
  System ID
  Format                lvm2
  Metadata Areas        2
  Metadata Sequence No  10
  VG Access             read/write
  VG Status             resizable
  MAX LV                0
  Cur LV                6
  Open LV               6
  Max PV                0
  Cur PV                2
  Act PV                2
  VG Size               27.75 GB
  PE Size               4.00 MB
  Total PE              7104
  Alloc PE / Size       5861 / 22.89 GB
  Free  PE / Size       1243 / 4.86 GB
  VG UUID               --------

Yes there is. Let’s extend the volume.

$ sudo lvextend -L +1G /dev/vg00/lvvar

Finally, extend the filesystem.

$ sudo resize2fs /dev/vg00/lvvar

Done.

Make net-snmp listen to IPv6 address

The Zenoss installation added its own server into the devices list as a default.  However, it is having trouble reading snmp values from itself.  Performing snmpwalk via the Zenoss web interface results in a timeout error.

The snmpwalk command used by Zenoss uses the IPv6 loopback address ::1.  I switched this to the IPv4 equivalent 127.0.0.1 and the snmpwalk worked fine.

It turns out, the snmp agent, net-snmp, only listens to IPv4 addresses by default.  Some changes need to be done to the net-snmp config file.

The following lines need to be added to /etc/snmp/snmpd.conf:

agentaddress udp:161
agentaddress udp6:161

#         sec.name       source          community
com2sec   notConfigUser  default         public
com2sec6  notConfigUser  default         public

Restart snmpd and it should now listen to IPv6 as well.

# service snmpd restart

Let’s install Zenoss 4! Part 3

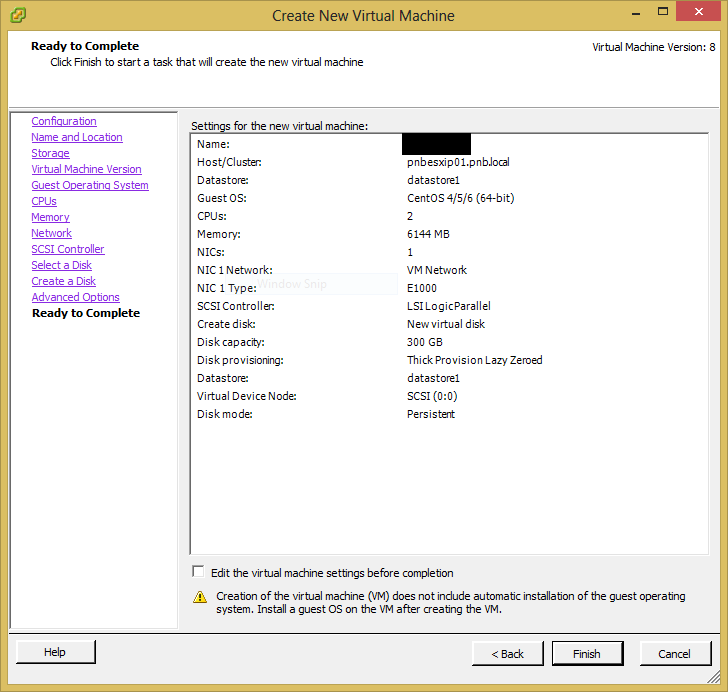
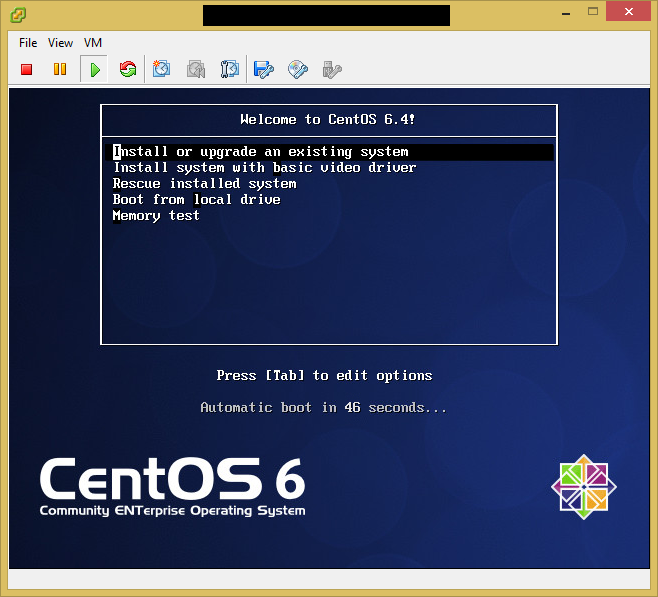
Okay, so now the server is up and running, it is time to install Zenoss.

First let’s go through the Zenoss requirements once again.

  1. SELinux is disabled.
    # sestatus
    SELinux status:                 enabled
    SELinuxfs mount:                /selinux
    Current mode:                   enforcing
    Mode from config file:          enforcing
    Policy version:                 24
    Policy from config file:        targeted

    SELinux is enabled by default and will have to be disabled manually.  This is done by modifying the line ‘SELINUX=enforcing’ to ‘SELINUX=disabled’ in /etc/sysconfig/selinux and then rebooting the server.

    # sestatus
    SELinux status:                 disabled
  2. Directory /opt/zenoss is not a symlink to another location.
    # ls -al /opt | grep zenoss
    drwxr-xr-x.  3 root root 4096 May 12 11:06 zenoss
  3. umask is set to 022
    # umask
    0022
  4. /home directory is writable by root (or /home/zenoss exists as user zenoss’s home directory)
    # ls -al /home
    total 24
    drwxr-xr-x.  3 root root  4096 Sep 23  2011 .
    dr-xr-xr-x. 22 root root  4096 May 12 23:49 ..
    drwx------.  2 root root 16384 May 12 11:06 lost+found
  5. connected to the internet
  6. DNS is available
    # wget google.com
    -bash: wget: command not found
    # yum install wget
    ...
    Complete!
    # wget google.com
    (successfully downloaded index.html)

Let’s start installing Zenoss proper.

# wget --no-check-certificate https://github.com/zenoss/core-autodeploy/tarball/4.2.3 -O auto.tar.gz
(successfully downloaded auto.tar.gz)
# tar xvf auto.tar.gz
zenoss-core-autodeploy-3200e76/
zenoss-core-autodeploy-3200e76/README.rst
zenoss-core-autodeploy-3200e76/core-autodeploy.sh
zenoss-core-autodeploy-3200e76/secure_zenoss.sh
zenoss-core-autodeploy-3200e76/zenpack_actions.txt

Now let’s  check the contents of zenpack_actions.txt and core-autodeploy.sh.

zenpack_actions.txt contains the list of zenpacks to be installed by default.  I am going to leave it unmodified.

core-autodeploy.sh will do the following:

  1. Set umask to 022
  2. Check if /opt/zenoss is a symlink, and exit if it is.
  3. Check if MySQL has already been installed and exit if it has.
  4. Disable SELinux (I guess I did not have to disable it manually).
  5. Install Zenoss, MySQL, RabbitMQ, JRE, and rrdtool.

Let’s see it in action!

# ./core-autodeploy.sh

It appears that the distro-supplied version of MySQL is at least partially installed,
or a prior installation attempt failed.

Please remove these packages, as well as their dependencies (often postfix), and then
retry this script:

mysql-libs-5.1.69-1.el6_4.x86_64

It looks like the minimal CentOS 6.4 installation did include mysql-libs, and it has to be removed before running the Zenoss auto-deploy script.

# rpm -e mysql-libs-5.1.69-1.el6_4.x86_64
error: Failed dependencies:
        libmysqlclient.so.16()(64bit) is needed by (installed) postfix-2:2.6.6-2.2.el6_1.x86_64
        libmysqlclient.so.16(libmysqlclient_16)(64bit) is needed by (installed) postfix-2:2.6.6-2.2.el6_1.x86_64
        mysql-libs is needed by (installed) postfix-2:2.6.6-2.2.el6_1.x86_64

I guess postfix will have to be removed as well.

# rpm -e mysql-libs-5.1.69-1.el6_4.x86_64 postfix-2.6.6-2.2.el6_1.x86_64
error: Failed dependencies:
        /usr/sbin/sendmail is needed by (installed) cronie-1.4.4-7.el6.x86_64

Ok this is getting annoying. Let’s use yum.

# yum remove mysql-libs
Loaded plugins: fastestmirror
Setting up Remove Process
Resolving Dependencies
--> Running transaction check
---> Package mysql-libs.x86_64 0:5.1.69-1.el6_4 will be erased
--> Processing Dependency: libmysqlclient.so.16()(64bit) for package: 2:postfix-2.6.6-2.2.el6_1.x86_64
--> Processing Dependency: libmysqlclient.so.16(libmysqlclient_16)(64bit) for package: 2:postfix-2.6.6-2.2.el6_1.x86_64
--> Processing Dependency: mysql-libs for package: 2:postfix-2.6.6-2.2.el6_1.x86_64
--> Running transaction check
---> Package postfix.x86_64 2:2.6.6-2.2.el6_1 will be erased
--> Processing Dependency: /usr/sbin/sendmail for package: cronie-1.4.4-7.el6.x86_64
--> Running transaction check
---> Package cronie.x86_64 0:1.4.4-7.el6 will be erased
--> Processing Dependency: cronie = 1.4.4-7.el6 for package: cronie-anacron-1.4.4-7.el6.x86_64
--> Running transaction check
---> Package cronie-anacron.x86_64 0:1.4.4-7.el6 will be erased
--> Processing Dependency: /etc/cron.d for package: crontabs-1.10-33.el6.noarch
--> Restarting Dependency Resolution with new changes.
--> Running transaction check
---> Package crontabs.noarch 0:1.10-33.el6 will be erased
--> Finished Dependency Resolution

Dependencies Resolved

=================================================================================================================================================================================
 Package                              Arch                         Version                                  Repository                                                      Size
=================================================================================================================================================================================
Removing:
 mysql-libs                           x86_64                       5.1.69-1.el6_4                           @updates                                                       4.0 M
Removing for dependencies:
 cronie                               x86_64                       1.4.4-7.el6                              @anaconda-CentOS-201303020151.x86_64/6.4                       166 k
 cronie-anacron                       x86_64                       1.4.4-7.el6                              @anaconda-CentOS-201303020151.x86_64/6.4                        43 k
 crontabs                             noarch                       1.10-33.el6                              @anaconda-CentOS-201303020151.x86_64/6.4                       2.4 k
 postfix                              x86_64                       2:2.6.6-2.2.el6_1                        @anaconda-CentOS-201303020151.x86_64/6.4                       9.7 M

Transaction Summary
=================================================================================================================================================================================
Remove        5 Package(s)

Installed size: 14 M
Is this ok [y/N]: y
Downloading Packages:
Running rpm_check_debug
Running Transaction Test
Transaction Test Succeeded
Running Transaction
  Erasing    : cronie-anacron-1.4.4-7.el6.x86_64                                                                                                                             1/5
  Erasing    : crontabs-1.10-33.el6.noarch                                                                                                                                   2/5
  Erasing    : cronie-1.4.4-7.el6.x86_64                                                                                                                                     3/5
  Erasing    : 2:postfix-2.6.6-2.2.el6_1.x86_64                                                                                                                              4/5
  Erasing    : mysql-libs-5.1.69-1.el6_4.x86_64                                                                                                                              5/5
  Verifying  : crontabs-1.10-33.el6.noarch                                                                                                                                   1/5
  Verifying  : cronie-1.4.4-7.el6.x86_64                                                                                                                                     2/5
  Verifying  : cronie-anacron-1.4.4-7.el6.x86_64                                                                                                                             3/5
  Verifying  : 2:postfix-2.6.6-2.2.el6_1.x86_64                                                                                                                              4/5
  Verifying  : mysql-libs-5.1.69-1.el6_4.x86_64                                                                                                                              5/5

Removed:
  mysql-libs.x86_64 0:5.1.69-1.el6_4

Dependency Removed:
  cronie.x86_64 0:1.4.4-7.el6             cronie-anacron.x86_64 0:1.4.4-7.el6             crontabs.noarch 0:1.10-33.el6             postfix.x86_64 2:2.6.6-2.2.el6_1

Complete!

Ok now that’s settled, let’s run the auto-deploy script again.

# ./core-autodeploy.sh
...
   (a whole lot of downloading and installing)
...
MySQL is configured with a blank root password.
Configure a secure MySQL root password? [Yn]:Y
  Enter new MySQL root password:
Confirm new MySQL root password:
...
   (more installation..)
...
Zenoss installation completed.
Securing configuration files...
Zenoss Core 4.2.3 install completed successfully!

Please visit http://127.0.0.1:8080 in your favorite Web browser to complete
setup.

NOTE: You may need to disable or modify this server's firewall to access port
8080. To disable this system's firewall, type:

# service iptables save
# service iptables stop
# chkconfig iptables off

Alternatively, you can modify your firewall to enable incoming connections to
port 8080. Here is a full list of all the ports Zenoss accepts incoming
connections from, and their purpose:

        8080 (TCP)                 Web user interface
        11211 (TCP and UDP)        memcached
        514 (UDP)                  syslog
        162 (UDP)                  SNMP traps

If you encounter problems with this script, please report them on the
following wiki page:

http://wiki.zenoss.org/index.php?title=Talk:Install_Zenoss

Thank you for using Zenoss. Happy monitoring!

I am quite surprised that the auto-deploy script worked so well.

Now let’s modify the firewall as per the advice at the end of the installation.

# iptables -L -v
Chain INPUT (policy ACCEPT 0 packets, 0 bytes)
 pkts bytes target     prot opt in     out     source               destination
 357K  410M ACCEPT     all  --  any    any     anywhere             anywhere            state RELATED,ESTABLISHED
    1    64 ACCEPT     icmp --  any    any     anywhere             anywhere
  148  8880 ACCEPT     all  --  lo     any     anywhere             anywhere
    1    52 ACCEPT     tcp  --  any    any     anywhere             anywhere            state NEW tcp dpt:ssh
  977  118K REJECT     all  --  any    any     anywhere             anywhere            reject-with icmp-host-prohibited

Chain FORWARD (policy ACCEPT 0 packets, 0 bytes)
 pkts bytes target     prot opt in     out     source               destination
    0     0 REJECT     all  --  any    any     anywhere             anywhere            reject-with icmp-host-prohibited

Chain OUTPUT (policy ACCEPT 269K packets, 60M bytes)
 pkts bytes target     prot opt in     out     source               destination

# iptables -I INPUT 5 -p tcp --dport 8080 -j ACCEPT
# iptables -I INPUT 6 -p tcp --dport 11211 -j ACCEPT
# iptables -I INPUT 7 -p udp --dport 11211 -j ACCEPT
# iptables -I INPUT 8 -p udp --dport 514 -j ACCEPT
# iptables -I INPUT 9 -p udp --dport 162 -j ACCEPT
# iptables -L -v
Chain INPUT (policy ACCEPT 0 packets, 0 bytes)
 pkts bytes target     prot opt in     out     source               destination
 441K  439M ACCEPT     all  --  any    any     anywhere             anywhere            state RELATED,ESTABLISHED
    1    64 ACCEPT     icmp --  any    any     anywhere             anywhere
  165  9868 ACCEPT     all  --  lo     any     anywhere             anywhere
    1    52 ACCEPT     tcp  --  any    any     anywhere             anywhere            state NEW tcp dpt:ssh
    0     0 ACCEPT     tcp  --  any    any     anywhere             anywhere            tcp dpt:webcache
    0     0 ACCEPT     tcp  --  any    any     anywhere             anywhere            tcp dpt:memcache
    0     0 ACCEPT     udp  --  any    any     anywhere             anywhere            udp dpt:memcache
    0     0 ACCEPT     udp  --  any    any     anywhere             anywhere            udp dpt:syslog
    0     0 ACCEPT     udp  --  any    any     anywhere             anywhere            udp dpt:snmptrap
 1991  244K REJECT     all  --  any    any     anywhere             anywhere            reject-with icmp-host-prohibited

Chain FORWARD (policy ACCEPT 0 packets, 0 bytes)
 pkts bytes target     prot opt in     out     source               destination
    0     0 REJECT     all  --  any    any     anywhere             anywhere            reject-with icmp-host-prohibited

Chain OUTPUT (policy ACCEPT 166 packets, 41427 bytes)
 pkts bytes target     prot opt in     out     source               destination
# service iptables save
iptables: Saving firewall rules to /etc/sysconfig/iptables:[  OK  ]

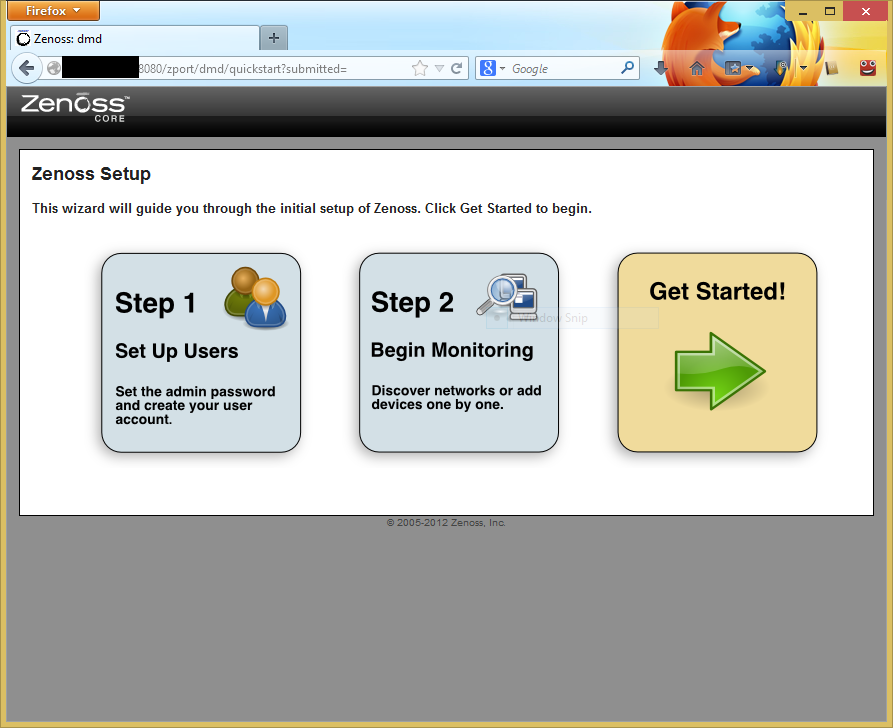
Now the Zenoss web interface should be available via http://hostname:8080.

Zenoss first start page
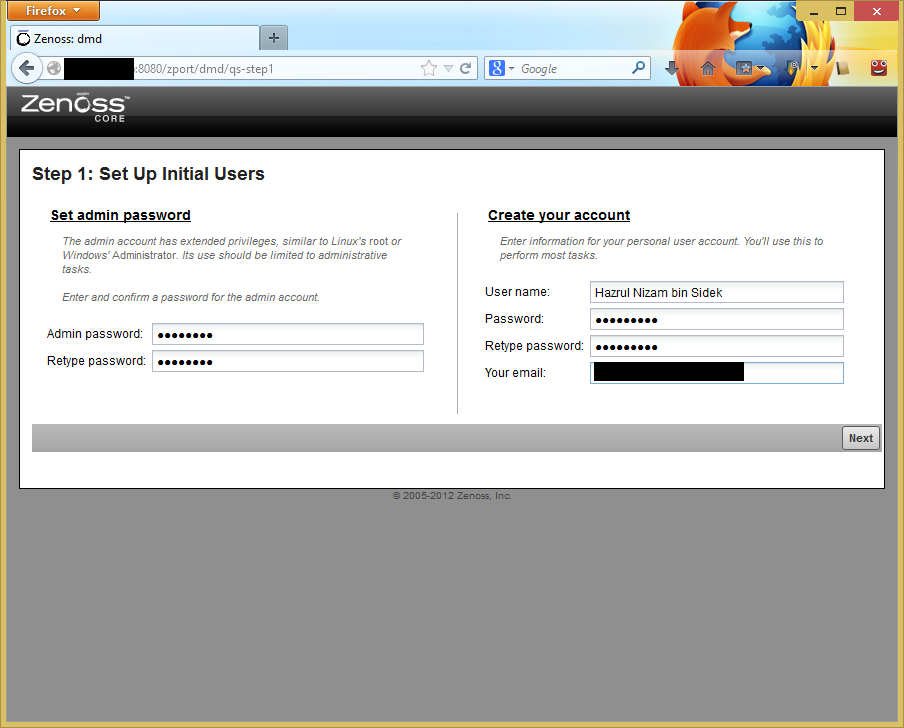
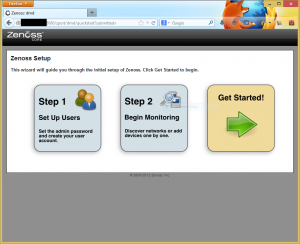
Let’s click Get Started!  The next page asks to specify a password for the admin user, as well as creating a new user.

Set admin password and create new user
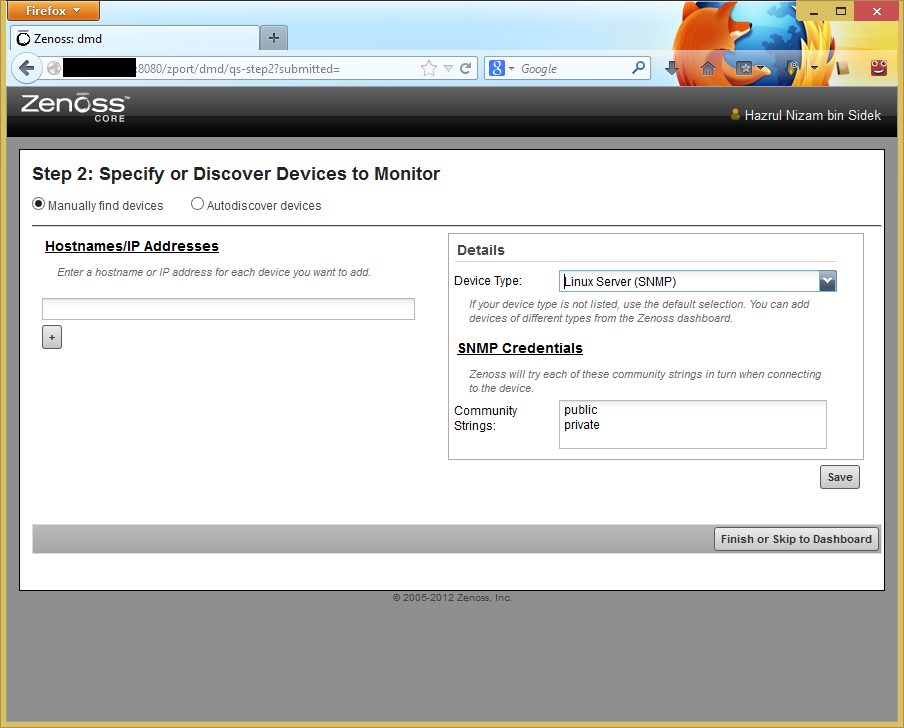
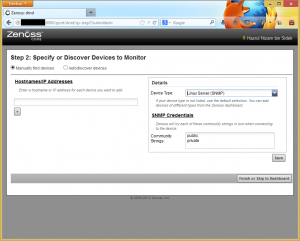
Next comes the page where you can start adding devices.  I add devices later so I’ll just click Finish.

Skip adding devices
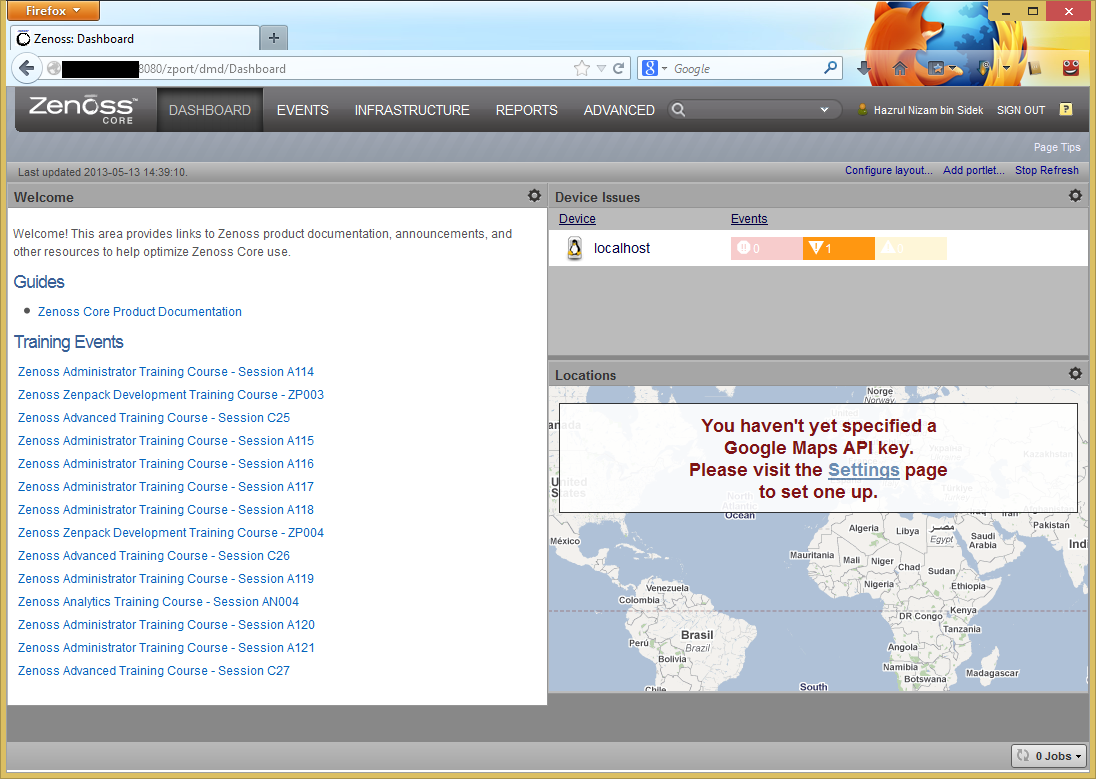
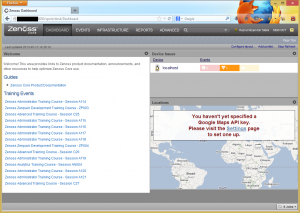
The next screen is the Zenoss dashboard.

Zenoss dashboardThat concludes the Zenoss Core 4 installation on CentOS 6.4.

WordPress cannot send email because of SELinux

The default SELinux configuration will block WordPress from sending emails. Using the check email plugin, error messages can be found in /var/log/audit/audit.log:

type=AVC msg=audit(1368370436.817:271444): avc:  denied  { search } for  pid=13875 comm="sendmail" name="postfix" dev=dm-0 ino=1179960 scontext=unconfined_u:system_r:httpd_t:s0 tcontext=system_u:object_r:postfix_spool_t:s0 tclass=dir

To overcome this, the SELinux boolean ‘httpd_can_sendmail’ must be set to on.

# getsebool -a | grep httpd_can_sendmail
httpd_can_sendmail --> off
# setsebool -P httpd_can_sendmail=on
# getsebool -a | grep httpd_can_sendmail
httpd_can_sendmail --> on

The -P flag is for the boolean setting to persist across reboots.

Let’s install Zenoss 4! Part 2

Let’s start by installing CentOS 6.4.  I am going to do it in a ESXi virtual machine, with 2 vCPUs, 6GB RAM, and a 300GB virtual disk.

ESXi VM parameters

 Attach the CentOS install DVD and let’s fire the VM up!

CentOS 6 DVD Boot

Skip the media check..

Select Skip

Next, next, next, next..

NextNextNextNext

Agree to discard data in the disk, since it is a virtual ESXi vmdk disk.

Discard data

Key in the FQDN of the server, and click Configure Network.

Insert hostname and click Configure Network

Configure the network, in this case running on eth0.

Edit eth0 Fill in IP address, netmask, gateway, DNS servers, and DNS search string Close

Next.

Next

Choose appropriate timezone.

Choose timezone

Choose a secure password for root user.

Key in password for root

Don’t forget to click ‘Review and modify partitioning layout’ as the Zenoss installation will require non-journaled filesystem for the RRD files.

Choose 'Review and modify partitioning layout' and click Next

The default swap did not show exactly 6GB, so I fixed that.  I then gave 150GB to root (‘/’), 60GB to home partition (‘/home’), and the remaining free space for the RRD files.  I used ‘/opt/zenoss/perf’ as the mount point for the RRD files because that is the information given in the Zenoss installation guide.  I have not checked the auto-deploy script yet, so this might be the wrong thing to do.  The ext2 filesystem is used because ext2 is not a journaled filesystem.

Modify partition layout

Agree to format sda.

Format sda

Agree to write partition layout to disk.

Finalise changes to disk

Writing changes to disk

Agree to install bootloader into sda.

Install bootloader

I choose the minimal installation, because I will not be needing the GUI and would like the server to be as clean as possible without unwanted rubbish.

Choose minimal install

Wait for the installation to complete.

Begin installation

Installation almost complete

Click reboot to reboot the server after the installation has been completed.

Click rebootRebooting

Installation has been completed and the server booted to the console login screen.

Reboot complete

That concludes the server OS installation.  In the next post I will begin installing Zenoss proper.