Tag Archives: oracle

Install Oracle Enterprise Manager Cloud Control 12c Release 3 on Oracle Linux 6

Introduction

This post is intended to document the process of installing Oracle Enterprise Manager Cloud Control 12c Release 3 on Oracle Linux 6.

Licensing

OEM Cloud Control is used as a centralised management point for Oracle Database installations in your environment.

You can install this for free and use the base functionalities for free as long as you have an active support subscription with Oracle for any targets (database, hosts, etc.) you want to manage.

The list of the base functionalities you can use for free can be reviewed on the OEM Cloud Control Licensing Guide.

Server setup

First, we start with a minimal installation of Oracle Linux 6 with 8GB of RAM and 100GB hard disk.  A swap space of 8GB is configured.

Install Oracle Database

OEM Cloud Control will use an Oracle Database to store OEM data, and this database will have to have been installed when you run the OEM Cloud Control installer.  The OEM Cloud Control installer will not install the Oracle Database as part of the installation.

You may use an existing Oracle Database for this purpose or you can install a separate database specifically for it.

From the Licensing Guide:

Enterprise Manager includes a restricted-use license of the Oracle Database for use only with the Oracle Management Repository or other complementary repositories included with Enterprise Manager (such as, Ops Center, Real User Experience Insight, Load Testing, and Test Manager).

Additional database options or additional servers for disaster recovery require separate licensing. Customers receive one single-instance database with the Cloud Control, or RMAN, repository. To protect the repository with Data Guard, customers need to purchase a license for the standby site. To protect the repository with Oracle Real Application Clusters, customers must license the second node for the database, and both nodes require an Oracle Real Application Clusters license.

As long as you use a single-instance installation of Oracle Database and do not use this database for anything other than OEM, the database is considered properly licensed.

Prep the server for Oracle Database installation

Funnily enough, at the time of writing, the highest version of Oracle Database certified to be used as the OEM repository is 11gR2.  12c is not certified.

You can check the certifications via My Oracle Support by following the steps in the Installation Guide.

Now we install the 11gR2 pre-requisite RPM to prepare the server for Oracle Database installation.

[root@server ~]# yum install oracle-rdbms-server-11gR2-preinstall

The preinstall RPM will have added the oracle OS user, as well as the oinstall and dba OS groups.

Next, we create the directory structure to hold the Oracle Database files.

[root@server ~]# mkdir -p /u01/app/oracle
[root@server ~]# chown -R oracle:oinstall /u01

Get the Oracle Database installer from OTN, and copy the files into the server.  Finally, unzip the installation files.

Perform Oracle Database Installation

Set up X forwarding, and run the installer as the oracle user.

[oracle@server ~]$ cd database
[oracle@server database]$ ./runInstaller

Choose to configure a database during installation.

Choose to configure database during installation.

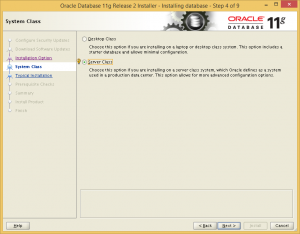
Choose a server class installation.

Choose server class

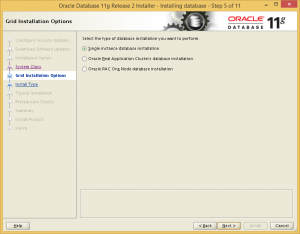
Choose single instance installation.

Choose single-instance installation.

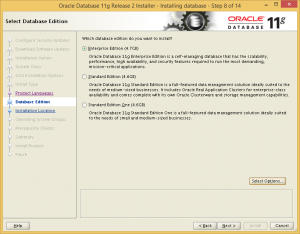
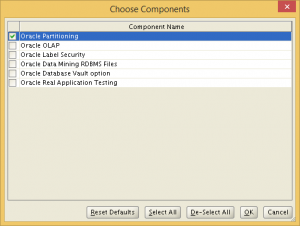
Choose Enterprise Edition, and de-select all options except Partitioning, which is required by OEM Cloud Control 12c.  We remove all unnecessary options to avoid future trouble with Oracle Licensing.

Choose Enterprise EditionDe-select all options except Partitioning.

Proceed with the rest of the installation as usual.  Just accept all the defaults for the database configuration, as we will remove this database later and create a new one.

Create repository instance

After the installation has completed, run the Database Configuration Assistant (DBCA) and remove the instance configured during the database installation.

Then use DBCA to create a new instance from scratch.  Using any of the seed databases supplied by Oracle will not do as the database for the OEM repository should not have the SYSMAN schema present.

The settings for the new database should match your expected deployment size.  Refer to the Advanced Installation and Configuration Guide for sizing guide.  For this article, I will be using the SMALL deployment size, which have the following settings for the repository database:

Parameter Minimum Value
processes 300
pga_aggregate_target* 1024 MB
sga_target* 2 GB
redo log file size 300 MB
shared_pool_size 600 MB
*memory_target of 3 GB can be used in place of sga_target and pga_aggregate_target

We can now begin creating the database using DBCA.

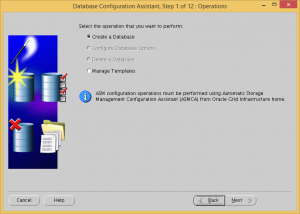
Choose to create a database.

Choose Create a Database

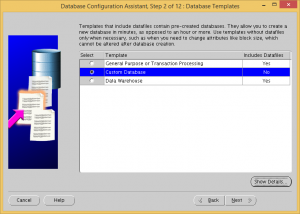
Choose to create a custom database.

Choose Custom Database

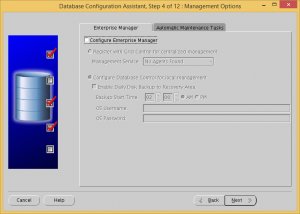
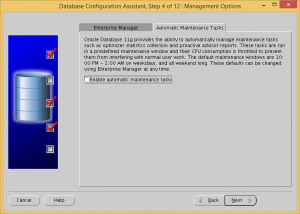
Uncheck the Configure Enterprise Manager and Enable automatic maintenance tasks checkboxes.

Uncheck Configure Enterprise ManagerUncheck enable automatic maintenance tasks

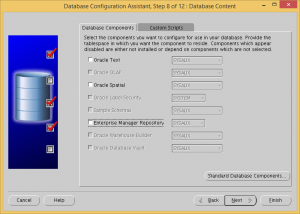
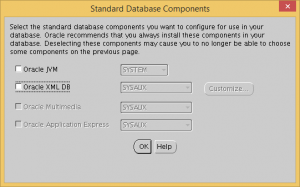
Remove all the optional database components

Remove all optional componentsRemove all optional components

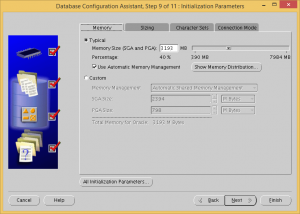
Check the Use Automatic Memory Management checkbox and make sure the memory size is more than 3 GB.

Enable Automatic Memory Management

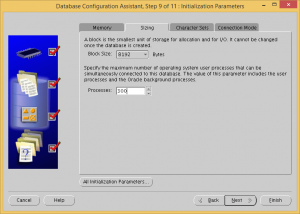
Set processes to 300.

Set processes to 300

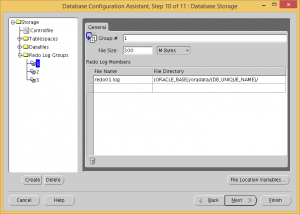
Change all three redo log file sizes to 300 MB.

Set redo log file size to 300 MB.

Complete the database creation.

Install Oracle Enterprise Manager Cloud Control 12c Release 3

With the repository database ready, it is time to install the OEM proper.

Review package requirements.

First, review the operating system package requirements from the Installation Guide.

For my installation, since the oracle-rdbms-server-11gR2-preinstall package was already installed, the only missing package is the glibc-devel 32-bit package.  So, that will now be installed using yum.

[root@server ~]# yum install glibc-devel.i686

Next, get the installer from OTN.

Unzip the files, and run the installer as the oracle user.

[oracle@server oem]$ ./runInstaller

Configure the email and software updates if you want to, and click Next.

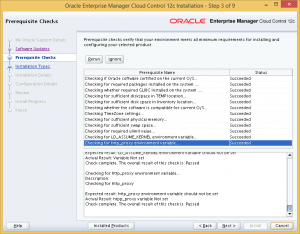
The pre-requisite checks will be performed, and in my case, all the tests were successful.

Pre-requisite checks

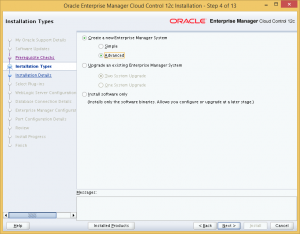
Choose to create a new Advanced Enterprise Manager System.

Choose Advanced Installation

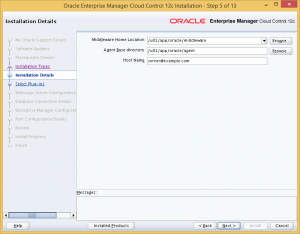
Next, specify the location to install the Middleware and Agent components of OEM Cloud Control.  I chose to use the ORACLE_BASE of the database installation as the base directory, with directories for the Middleware and Agent components located in this base.

Specify middleware and agent directories

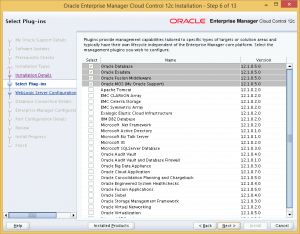
The next page we will be able to choose which management plugins we wish to install.  For my install, I will only use OEM Cloud Control to manage Oracle Databases.  Therefore, I will not install any additional plugins.

Choose plugins to install.

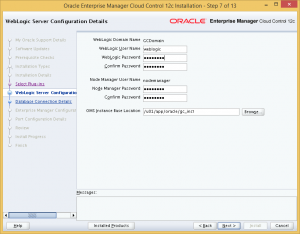
Next, provide passwords WebLogic and Node Manager, and specify installation directory for OMS.  Again, I used the same directory structure as the Oracle Database installation.

Provide passwords and specify OMS installation directory.

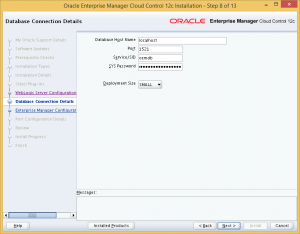
Step 8: Provide the details of the repository database.  Here we insert the details of the repository database which we have installed earlier, and select the corresponding deployment size.

Insert database details and deployment size.

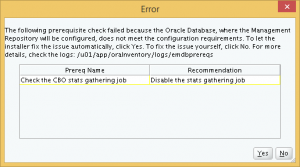
When I clicked Next, an error popped out saying that a CBO statistics collection job must be disabled.  The installer offered to fix this automatically, and I accept.

Click Yes to disable CBO stats gathering job.

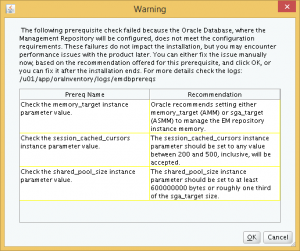
After clicking Yes, the installer presented me with several warnings regarding database parameter mis-matches that will affect the performance of the OEM Cloud Control.  I can choose to fix them now, or proceed with the installation and fix them later.

Database parameter mis-match warnings.

The first warning is about the memory_target parameter.  However, checking the parameter shows that the parameter is set up correctly for the SMALL deployment size.

SQL> show parameter memory_target

NAME                                 TYPE        VALUE
------------------------------------ ----------- ------------------------------
memory_target                        big integer 3200M

The second warning is for the session_cached_cursors parameter.  Change this to the recommended value.  This parameter is not changeable online, so a database restart is required.

SQL> show parameter session_cached_cursors

NAME                                 TYPE        VALUE
------------------------------------ ----------- ------------------------------
session_cached_cursors               integer     50

SQL> alter system set session_cached_cursors=500 scope=SPFILE;

System altered.

SQL> shutdown immediate
Database closed.
Database dismounted.
ORACLE instance shut down.
SQL> startup
ORACLE instance started.

Total System Global Area 3340451840 bytes
Fixed Size                  2257840 bytes
Variable Size            1811942480 bytes
Database Buffers         1509949440 bytes
Redo Buffers               16302080 bytes
Database mounted.
Database opened.
SQL> show parameter session_cached_cursors;

NAME                                 TYPE        VALUE
------------------------------------ ----------- ------------------------------
session_cached_cursors               integer     500


The third and final change is to the shared_pool_size parameter.

SQL> show parameter shared_pool_size

NAME                                 TYPE        VALUE
------------------------------------ ----------- ------------------------------
shared_pool_size                     big integer 0
SQL> alter system set shared_pool_size=600M scope=both;

System altered.

SQL> show parameter shared_pool_size

NAME                                 TYPE        VALUE
------------------------------------ ----------- ------------------------------
shared_pool_size                     big integer 608M

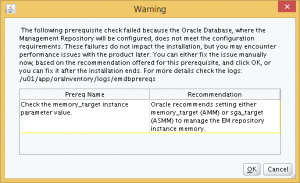
Now, we return to the installer and click Cancel and re-run the database check.  Now, only one warning appears, which I guess is an installer glitch in reading the memory parameter.  Click Ok to resume with the installation.

The remaining database parameter mis-match warning.

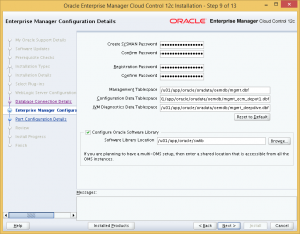
Step 9: On this page of the installer, we specify the passwords for SYSMAN and registration.  This SYSMAN password will be used in the initial login to the OEM Cloud Control.  You can change the default locations of the tablespaces to be created, and also the location of the software library to be used by OEM Cloud Control.

Provide passwords and tablespace locations.

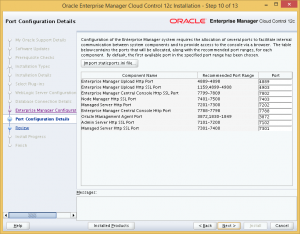
Step 10: Review the port assignments for OEM Cloud Control, or change them if you wish.

Review port assignments.

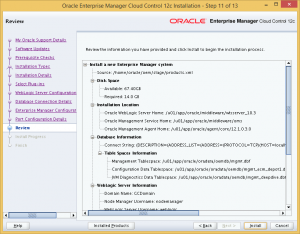
Step 11: Finally, we get to the review page.  Click Install to begin OEM Cloud Control installation.

Review Page.

The installer will prompt for execution of root scripts.  Run the script.

[root@server ~]# /u01/app/oracle/middleware/oms/allroot.sh

Starting to execute allroot.sh .........

Starting to execute /u01/app/oracle/middleware/oms/root.sh ......
Running Oracle 11g root.sh script...

The following environment variables are set as:
    ORACLE_OWNER= oracle
    ORACLE_HOME=  /u01/app/oracle/middleware/oms

Enter the full pathname of the local bin directory: [/usr/local/bin]: <Press Enter>
The file "dbhome" already exists in /usr/local/bin.  Overwrite it? (y/n)
[n]:<Press Enter>
The file "oraenv" already exists in /usr/local/bin.  Overwrite it? (y/n)
[n]:<Press Enter>
The file "coraenv" already exists in /usr/local/bin.  Overwrite it? (y/n)
[n]:<Press Enter>

Entries will be added to the /etc/oratab file as needed by
Database Configuration Assistant when a database is created
Finished running generic part of root.sh script.
Now product-specific root actions will be performed.
/etc exist

Creating /etc/oragchomelist file...
/u01/app/oracle/middleware/oms
Finished execution of  /u01/app/oracle/middleware/oms/root.sh ......


Starting to execute /u01/app/oracle/agent/core/12.1.0.3.0/root.sh ......
Finished product-specific root actions.
/etc exist
Finished execution of  /u01/app/oracle/agent/core/12.1.0.3.0/root.sh ......

The installation is now completed.

Configure firewall for OEM Cloud Control

Now we we will need to configure the firewall to enable OEM Cloud Control to work properly.  Of course, you can disable the firewall instead should you choose to.

Check the Port List

First, check the list of ports used by your installation.  This list can be located inside your middleware installation directory <path_to_middleware>/oms/install/portlist.ini.

[root@server ~]# cat /u01/app/oracle/middleware/oms/install/portlist.ini
Enterprise Manager Upload Http Port=4889
Enterprise Manager Upload Http SSL Port=4903
Enterprise Manager Central Console Http SSL Port=7802
Node Manager Http SSL Port=7403
Managed Server Http Port=7202
Enterprise Manager Central Console Http Port=7788
Oracle Management Agent Port=3872
Admin Server Http SSL Port=7102
Managed Server Http SSL Port=7301

Configure Firewall

Next, configure the firewall to allow incoming connections from all the ports listed above.

[root@server ~]# iptables -I INPUT 5 -m state --state NEW -p tcp --dport 4889 -j ACCEPT
[root@server ~]# iptables -I INPUT 6 -m state --state NEW -p tcp --dport 4903 -j ACCEPT
[root@server ~]# iptables -I INPUT 7 -m state --state NEW -p tcp --dport 7802 -j ACCEPT
[root@server ~]# iptables -I INPUT 8 -m state --state NEW -p tcp --dport 7403 -j ACCEPT
[root@server ~]# iptables -I INPUT 9 -m state --state NEW -p tcp --dport 7202 -j ACCEPT
[root@server ~]# iptables -I INPUT 10 -m state --state NEW -p tcp --dport 7788 -j ACCEPT
[root@server ~]# iptables -I INPUT 11 -m state --state NEW -p tcp --dport 3872 -j ACCEPT
[root@server ~]# iptables -I INPUT 12 -m state --state NEW -p tcp --dport 7102 -j ACCEPT
[root@server ~]# iptables -I INPUT 13 -m state --state NEW -p tcp --dport 7301 -j ACCEPT
[root@server ~]# service iptables save
iptables: Saving firewall rules to /etc/sysconfig/iptables:[  OK  ]

Login to OEM Cloud Control

Now, we are ready to login for the first time to the OEM Cloud Control installation.  Open up a browser and go to the following URL:

https://server:<port>/em

The port should be the port listed for Enterprise Manager Central Console Http SSL Port in the portlist.ini file that we checked earlier.

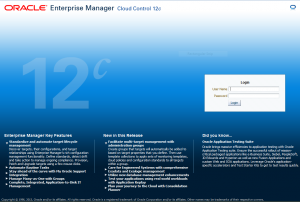
Login Page

Login with username SYSMAN and the password for SYSMAN that was set during the OEM Cloud Control installation earlier.

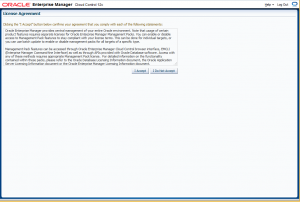
You will be presented with a License Agreement Page.

License Agreement Page

Read the license agreement and click I Accept.

You will now be presented with the Welcome Page.  You can now start using OEM Cloud Control 12c.
Upgrade Oracle APEX from 4.2.4 to 4.2.5

Introduction

Oracle recently released version 4.2.5 of its Application Express (APEX) software.  This post is to document how to upgrade Oracle APEX from 4.2.4 to 4.2.5.

The Oracle APEX installation to be upgraded has the following specification:

  1. The operating system of the server is CentOS 6.5.
  2. The Oracle Database version is Oracle XE 11gR2.
  3. Oracle APEX is served using the APEX Listener, via GlassFish 4.

Download and read the Patch Set Notes

First things first, read up on the patch set notes here.

Download and unzip the Patch Set

Next, the patch set is downloaded via Oracle Support.

The downloaded patch set is then extracted.

[oracle@server ~]$ unzip p17966818_425_Generic.zip

Backup database

The database is backed up as a precaution if the patch is unsuccessful.

I prefer a cold and consistent backup to ease the recovery process.

[oracle@server ~]$ rman target / nocatalog

Recovery Manager: Release 11.2.0.2.0 - Production on Fri Apr 25 09:38:09 2014

Copyright (c) 1982, 2009, Oracle and/or its affiliates.  All rights reserved.

connected to target database: XE (DBID=2709648321)
using target database control file instead of recovery catalog

RMAN> shutdown immediate

database closed
database dismounted
Oracle instance shut down

RMAN> startup mount

connected to target database (not started)
Oracle instance started
database mounted

RMAN> backup database plus archivelog;

RMAN> alter database open;

database opened
RMAN> exit

Recovery Manager complete.

Prevent access to the APEX instance

No users should be using the APEX installation while it is being upgraded.  Access to the instance should be limited.  In this particular case, since APEX is served by the APEX Listener which is hosted by a GlassFish instance, user access is prevented by shutting down the GlassFish instance.

[oracle@server ~]$ sudo service glassfish4 stop
Shutting down glassfish4: Waiting for the domain to stop ...
Command stop-domain executed successfully.
                                                           [  OK  ]

The above command is used to control the GlassFish installation only if the corresponding service init script has already been correctly created.  An example on how this is done can be found here.

Apply the patch set

Now, set the current directory to the patch directory, and apply the patch.

[oracle@server ~]$ cd patch
[oracle@server patch]$ sqlplus / as sysdba

SQL*Plus: Release 11.2.0.2.0 Production on Fri Apr 25 09:38:45 2014

Copyright (c) 1982, 2011, Oracle.  All rights reserved.

Connected to:
Oracle Database 11g Express Edition Release 11.2.0.2.0 - 64bit Production

SQL> @apxpatch.sql

The patch will now be applied, and the process will take a few minutes.

Copy patch directory contents into APEX directory

After the patch process is completed, it is time to copy the contents of the patch directory into the original APEX installation directory.

[oracle@server patch]$ cp -R * /path/to/apex/

This will include the images directory as well, and if the path to the APEX directory is the same one used to originally create the images WAR file, the WAR file need not be recreated.

Restart GlassFish

The final step is to restart the GlassFish instance.

[oracle@server ~]$ sudo service glassfish4 start
Starting glassfish4: Waiting for domain1 to start .....................................................
Successfully started the domain : domain1
domain  Location: /home/gfish/glassfish4/glassfish/domains/domain1
Log File: /home/gfish/glassfish4/glassfish/domains/domain1/logs/server.log
Admin Port: 4848
Command start-domain executed successfully.
                                                           [  OK  ]

Now the APEX installation is successfully updated to version 4.2.5, and is ready to be accessed.

Upgrade Oracle APEX from 4.2.3 to 4.2.4

Introduction

Oracle recently released version 4.2.4 of its Application Express (APEX) software.  This post is to document how to upgrade Oracle APEX from 4.2.3 to 4.2.4.

The Oracle APEX installation to be upgraded has the following specification:

  1. The operating system of the server is CentOS 6.5.
  2. The Oracle Database version is Oracle XE 11gR2.
  3. Oracle APEX is served using the APEX Listener, via GlassFish 4.

Download and read the Patch Set Notes

First things first, read up on the patch set notes here.

Download and unzip the Patch Set

Next, the patch set is downloaded via Oracle Support.

The downloaded patch set is then extracted.

[oracle@server ~]$ unzip p17607802_424_Generic.zip

Backup database

The database is backed up as a precaution if the patch is unsuccessful.

I prefer a cold and consistent backup to ease the recovery process.

[oracle@server ~]$ rman target / nocatalog

Recovery Manager: Release 11.2.0.2.0 - Production on Tue Jan 7 12:33:41 2014

Copyright (c) 1982, 2009, Oracle and/or its affiliates.  All rights reserved.

connected to target database: XE (DBID=2709648321)
using target database control file instead of recovery catalog

RMAN> shutdown immediate

database closed
database dismounted
Oracle instance shut down

RMAN> startup mount

connected to target database (not started)
Oracle instance started
database mounted

RMAN> backup database plus archivelog;

RMAN> alter database open;

database opened
RMAN> exit

Recovery Manager complete.

Prevent access to the APEX instance

No users should be using the APEX installation while it is being upgraded.  Access to the instance should be limited.  In this particular case, since APEX is served by the APEX Listener which is hosted by a GlassFish instance, user access is prevented by shutting down the GlassFish instance.

[oracle@server ~]$ sudo service glassfish4 stop
Shutting down glassfish4: Waiting for the domain to stop ...
Command stop-domain executed successfully.
                                                           [  OK  ]

The above command is used to control the GlassFish installation only if the corresponding service init script has already been correctly created.  An example on how this is done can be found here.

Apply the patch set

Now, set the current directory to the patch directory, and apply the patch.

[oracle@server ~]$ cd patch
[oracle@server patch]$ sqlplus / as sysdba

SQL*Plus: Release 11.2.0.2.0 Production on Tue Jan 7 16:07:39 2014

Copyright (c) 1982, 2011, Oracle.  All rights reserved.

Connected to:
Oracle Database 11g Express Edition Release 11.2.0.2.0 - 64bit Production

SQL> @apxpatch.sql

The patch will now be applied, and the process will take a few minutes.

Copy patch directory contents into APEX directory

After the patch process is completed, it is time to copy the contents of the patch directory into the original APEX installation directory.

[oracle@server patch]$ cp -R * /path/to/apex/

This will include the images directory as well, and if the path to the APEX directory is the same one used to originally create the images WAR file, the WAR file need not be recreated.

Restart GlassFish

The final step is to restart the GlassFish instance.

[oracle@server ~]$ sudo service glassfish4 start
Starting glassfish4: Waiting for domain1 to start .....................................................
Successfully started the domain : domain1
domain  Location: /home/gfish/glassfish4/glassfish/domains/domain1
Log File: /home/gfish/glassfish4/glassfish/domains/domain1/logs/server.log
Admin Port: 4848
Command start-domain executed successfully.
                                                           [  OK  ]

Now the APEX installation is successfully updated to version 4.2.4, and is ready to be accessed.

OpenSSL workaround for Oracle XE wallet

In Oracle, the UTL_HTTP package is used to fetch pages from the internet directly by the database.  For example, using the UTL_HTTP.REQUEST function, the first 2000 bytes of a web page can be displayed:

SQL> SET PAGESIZE 100
SQL> select UTL_HTTP.REQUEST('http://www.google.com') from dual;

UTL_HTTP.REQUEST('HTTP://WWW.GOOGLE.COM')
--------------------------------------------------------------------------------
<!doctype html><html itemscope="" itemtype="http://schema.org/WebPage"><head><me
ta content="Search the world's information, including webpages, images, videos a
nd more. Google has many special features to help you find exactly what you're l
ooking for." name="description"><meta content="noodp" name="robots"><meta itempr
op="image" content="/images/google_favicon_128.png"><title>Google</title><script
>(function(){
window.google={kEI:"X057UtKqGYvprQeorYDgAQ",getEI:function(a){for(var b;a&&(!a.g
etAttribute||!(b=a.getAttribute("eid")));)a=a.parentNode;return b||google.kEI},h
ttps:function(){return"https:"==window.location.protocol},kEXPI:"17259,146147,40
00116,4006293,4006727,4007231,4007661,4007714,4007830,4008067,4008133,4008142,40
08365,4008725,4009033,4009378,4009565,4009663,4009671,4010061,4010806,4010899,40
10938,4011063,4011107,4011125,4011228,4011256,4011258,4011334,4011376,4011522,40
11524,4011525,4011529,4011559,4011619,4011683,4011709,4011863,4011872,4011911,40
11971,4012001,4012003,4012011,4012090,4012095,4012141,4012145,4012147,4012302,40
12306,4012316,4012318,4012342,4012361,4012365,4012422,4012544,4012585,4012593,40
12632",kCSI:{e:"17259,146147,4000116,4006293,4006727,4007231,4007661,4007714,400
7830,4008067,4008133,4008142,4008365,4008725,4009033,4009378,4009565,4009663,400
9671,4010061,4010806,4010899,4010938,4011063,4011107,4011125,4011228,4011256,401
1258,4011334,4011376,4011522,4011524,4011525,4011529,4011559,4011619,4011683,401
1709,4011863,4011872,4011911,4011971,4012001,4012003,4012011,4012090,4012095,401
2141,4012145,4012147,4012302,4012306,4012316,4012318,4012342,4012361,4012365,401
2422,4012544,4012585,4012593,4012632",ei:"X057UtKqGYvprQeorYDgAQ"},authuser:0,ml
:function(){},kHL:"en",time:function(){return(new Date).getTime()},log:function(
a,b,c,l,k){var d=new Image,f=google.lc,e=google.li,g="",h="gen_204";k&&(h=
k);d.onerror=d.onload=d.onabort=function(){delete f[e]};f[e]=d;c||-1!=b.search("
&ei=")||(g="&ei="+google.getEI(l));c=c||"/"+h+"?atyp=i&ct="+a+"&cad=

SQL>

However, for pages served with SSL i.e. the https protocol, UTL_HTTP will need access to an Oracle Wallet that stores the trusted certificates for the encryption. Attempting to connect without a wallet will result in a certificate validation error:

SQL> select UTL_HTTP.REQUEST('https://support.oracle.com') from dual;
select UTL_HTTP.REQUEST('https://support.oracle.com') from dual
       *
ERROR at line 1:
ORA-29273: HTTP request failed
ORA-06512: at "SYS.UTL_HTTP", line 1722
ORA-29024: Certificate validation failure
ORA-06512: at line 1

SQL>

An Oracle Wallet can be created by the Oracle Wallet Manager program.  Unfortunately, the Oracle Wallet Manager program is not distributed with Oracle XE.  I think this is because historically encryption has been part of Oracle Advanced Security, a paid optional Oracle feature.  The good news is SSL/TLS encryption is no longer part of Oracle Advanced Security, as per the Oracle 11gR2 Licensing Guide:

Network encryption (native network encryption and SSL/TLS) and strong authentication services (Kerberos, PKI, and RADIUS) are no longer part of Oracle Advanced Security and are available in all licensed editions of all supported releases of the Oracle database.

So far we have established that using TLS/SSL with Oracle XE is not violating any Oracle licensing issue.  We just have to find a way to create the wallet to be used by Oracle XE.  Of course you can run Oracle Wallet Manager from a non-XE Oracle installation somewhere, and transfer the wallet to your Oracle XE installation.  But what if you do not have access to any properly licensed installation of Oracle?

From the Oracle 11gR2 Advanced Security Guide:

Oracle Wallet Manager stores X.509 certificates and private keys in PKCS #12 format, and generates certificate requests according to the PKCS #10 specification. These capabilities make the Oracle wallet structure interoperable with supported third-party PKI applications and provide wallet portability across operating systems.

Therefore, we can use OpenSSL to create a PKCS #12 archive and it should work with Oracle XE.

In Oracle terminology, a wallet is a directory containing a file named ewallet.p12. Therefore, the PKCS #12 file must be named as such.

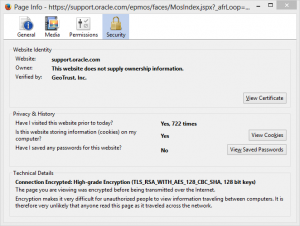
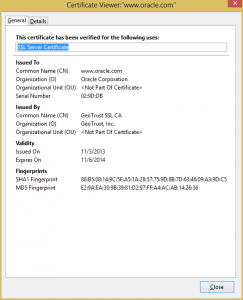
In this example I will use the Oracle Support web page as the target page.  First, grab the certificate and all the certificates in its chain by using a browser.  In Firefox, this is done by clicking the padlock icon in the address bar, then clicking on ‘More Information…’.

Firefox Page Info - Security tabThen click on ‘View Certificate’

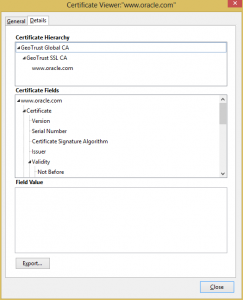
Firefox Certificate ViewerGo to the ‘Details’ tab

Firefox Certificate Viewer - Details tabSelect the certificate at the bottom of the chain (www.oracle.com) and click ‘Export…’.

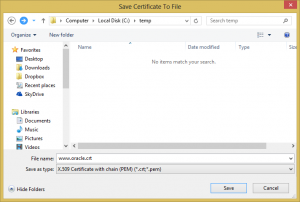
Save Certificate to FileChange the ‘Save as type’ to ‘X.509 Certificate with chain (PEM)’ and save the certificates to a file.

Transfer this file (mine is named www.oracle.crt) to your Oracle XE server where you want your wallet to be (I chose /u01/app/oracle/wallet).

Now use OpenSSL’s pkcs12 command to create the wallet file using the certificate file as input.  Use the -export flag to create a PKCS #12 file instead of reading one, and use the -nokeys flag to indicate that a private key does not exist inside the input file.  Enter a suitable password when prompted.  This password will have to be provided when using UTL_HTTP later.

[oracle@oraclexe ~]$ cd /u01/app/oracle/wallet
[oracle@oraclexe wallet]$ openssl pkcs12 -export -in www.oracle.crt -out ewallet.p12 -nokeys
Enter Export Password:
Verifying - Enter Export Password:
[oracle@oraclexe wallet]$

Now we can make SSL calls to the Oracle Support website from the database by providing the wallet and password to UTL_HTTP:

SQL> set pagesize 100
SQL> select UTL_HTTP.REQUEST('https://support.oracle.com',null,'file:/u01/app/oracle/wallet','password') Output from dual;

OUTPUT
--------------------------------------------------------------------------------
<HTML>
<HEAD>
<title>Oracle Configuration Support Manager</title>
<meta http-equiv="REFRESH" content="0;url=/epmos/faces/MosIndex.jspx"></HEAD>
<BODY>
</BODY>
</HTML>


Move Oracle APEX on Oracle XE 11gR2 from EPG to APEX Listener

I have been playing with Oracle Application Express (APEX) to make a few applications, but I have never been bothered to switch from the default Embedded PL/SQL Gateway (EPG).  However, after becoming a little bit familiar with APEX and its different configurations, I became interested to explore other ways of deploying APEX.

The purpose of this post is to document the switch-over of my APEX deployment from EPG to APEX Listener.

The OS of the server is CentOS 6.4.  I installed Oracle Express Edition (XE) 11gR2, with which APEX 4.0 is included.  I then upgraded APEX to 4.2.3, and installed GlassFish 4 Open Source Edition on the server.

Next, configure the APEX_PUBLIC_USER user.

 SQL> alter user apex_public_user identified by password account unlock;

After that it is time to disable EPG.

SQL> exec dbms_xdb.sethttpport(0);

Next, go into the APEX unzipped directory and run the configure restful services script.

$ cd apex_install_directory
$ sqlplus / as sysdba
SQL> @apex_rest_config
Enter a password for the APEX_LISTENER user              []
Enter a password for the APEX_REST_PUBLIC_USER user              []

PL/SQL procedure successfully completed.

PL/SQL procedure successfully completed.

...create APEX_LISTENER user

PL/SQL procedure successfully completed.

User created.

...create APEX_REST_PUBLIC_USER user

User created.

Grant succeeded.

Grant succeeded.

Grant succeeded.

Grant succeeded.

Grant succeeded.

Grant succeeded.

Grant succeeded.

Grant succeeded.

Grant succeeded.

Grant succeeded.

Grant succeeded.

Grant succeeded.

Grant succeeded.

Grant succeeded.

Grant succeeded.

Grant succeeded.

Grant succeeded.

Grant succeeded.

Grant succeeded.

Grant succeeded.

Grant succeeded.

Grant succeeded.

Grant succeeded.

Grant succeeded.

Session altered.

Synonym created.

Synonym created.

Synonym created.

Synonym created.

Synonym created.

Synonym created.

Synonym created.

Synonym created.

Synonym created.

Synonym created.

Synonym created.

Synonym created.

Synonym created.

Synonym created.

Synonym created.

Synonym created.

Synonym created.

Synonym created.

Synonym created.

Synonym created.

Synonym created.

Synonym created.

Session altered.

PL/SQL procedure successfully completed.

SQL>

Then, grant connect privileges to the APEX_040200 user.

 DECLARE
  ACL_PATH  VARCHAR2(4000);
BEGIN
  -- Look for the ACL currently assigned to '*' and give APEX_040200
  -- the "connect" privilege if APEX_040200 does not have the privilege yet.

  SELECT ACL INTO ACL_PATH FROM DBA_NETWORK_ACLS
   WHERE HOST = '*' AND LOWER_PORT IS NULL AND UPPER_PORT IS NULL;

  IF DBMS_NETWORK_ACL_ADMIN.CHECK_PRIVILEGE(ACL_PATH, 'APEX_040200',
     'connect') IS NULL THEN
      DBMS_NETWORK_ACL_ADMIN.ADD_PRIVILEGE(ACL_PATH,
     'APEX_040200', TRUE, 'connect');
  END IF;

EXCEPTION
  -- When no ACL has been assigned to '*'.
  WHEN NO_DATA_FOUND THEN
  DBMS_NETWORK_ACL_ADMIN.CREATE_ACL('power_users.xml',
    'ACL that lets power users to connect to everywhere',
    'APEX_040200', TRUE, 'connect');
  DBMS_NETWORK_ACL_ADMIN.ASSIGN_ACL('power_users.xml','*');
END;
/
COMMIT;

Download and unzip APEX Listener.

Configure APEX Listener.

# java -jar apex.war
This Listener instance has not yet been configured.
Please complete the following prompts

Enter the location to store configuration data:/root/apex_listener/
Oct 15, 2013 1:31:28 AM oracle.dbtools.common.config.cmds.ConfigDir execute
INFO: Set config.dir to /root/apex_listener/ in: /root/apex_listener/apex.war
Oct 15, 2013 1:31:29 AM oracle.dbtools.common.config.file.ConfigurationFolder logConfigFolder
INFO: Using configuration folder: /root/apex_listener/apex
Enter the name of the database server [localhost]:
Enter the database listen port [1521]:
Enter 1 to specify the database service name, or 2 to specify the database SID [1]:2
Enter the database SID [xe]:
Enter the database user name [APEX_PUBLIC_USER]:
Enter the database password for APEX_PUBLIC_USER:
Confirm password:
Enter 1 to enter passwords for the RESTful Services database users (APEX_LISTENER,APEX_REST_PUBLIC_USER), 2 to use the same password as used for APEX_PUBLIC_USER or, 3 to skip this step [1]:1
Enter the database password for APEX_LISTENER:
Confirm password:
Enter the database password for APEX_REST_PUBLIC_USER:
Confirm password:
Oct 15, 2013 1:32:38 AM oracle.dbtools.common.config.file.ConfigurationFiles update
INFO: Updated configurations: defaults, apex, apex_al, apex_rt
Enter 1 if you wish to start in standalone mode or 2 to exit [1]:2
#

Configure administrator for APEX Listener

# java -jar apex.war user adminlistener "Listener Administrator"
Oct 15, 2013 1:36:58 AM oracle.dbtools.common.config.file.ConfigurationFolder logConfigFolder
INFO: Using configuration folder: /root/apex_listener/apex
Enter a password for user adminlistener:
Confirm password for user adminlistener:
Oct 15, 2013 1:37:14 AM oracle.dbtools.standalone.ModifyUser execute
INFO: Created user: adminlistener in file: /root/apex_listener/apex/credentials

Create war for static images

# java -jar apex.war static /u01/app/oracle/apex/images
WAR Generation complete
 WAR location     : /root/apex_listener/i.war
 Context path     : /i
 Static resources : /u01/app/oracle/apex/images
Ensure the static resources are available at path: /u01/app/oracle/apex/images

Deploy on GlassFish.

Extracting tablespace DDL from Oracle

I have always used EM Database Control or the EM Console (that is installed with Oracle Client) to extract any DDL from Oracle Database.  I believe the main reason is Oracle has been encouraging young admins like me to use the GUI tools by insisting on using them in all Oracle’s training courses (DB Admin I and II comes to mind).

Today, I had to extract the DDL for a tablespace, without any of the GUI tools.

Luckily, Google saved the day, and I found this thread on the Oracle forums.

Basically, a function for this has already been included in Oracle inside the DBMS_METADATA package.

Just use the GET_DDL function:

SELECT DBMS_METADATA.GET_DDL('TABLESPACE','TABLESPACE_NAME') FROM dual;

Adding Oracle Linux 6.4 Installation DVD as a yum repository

First, make sure the install DVD is mounted properly and take note of the mount point.  For the purpose of this post, the DVD is mounted at /mnt.

Next, create a repository file at the yum repository directory.

# vi /etc/yum.repos.d/dvd.repo

Insert the following lines inside the file, and save.

[ol6-dvd]
name=Oracle Linux 6.4 Installation DVD $basearch
baseurl=file:///mnt/Server/
enabled=1
gpgcheck=1
gpgkey=file:///mnt/RPM-GPG-KEY

[ol6-dvd-UEK]
name=Oracle Linux 6.4 Installation DVD $basearch - UEK
baseurl=file:///mnt/UEK2/
enabled=1
gpgcheck=1
gpgkey=file:///mnt/RPM-GPG-KEY

Now, the yum command will use the DVD as a repository.  Don’t forget to disable other repositories in the folder if you do not want newer packages to be installed.