Tag Archives: glassfish

Upgrade Oracle APEX from 4.2.4 to 4.2.5

Introduction

Oracle recently released version 4.2.5 of its Application Express (APEX) software.  This post is to document how to upgrade Oracle APEX from 4.2.4 to 4.2.5.

The Oracle APEX installation to be upgraded has the following specification:

  1. The operating system of the server is CentOS 6.5.
  2. The Oracle Database version is Oracle XE 11gR2.
  3. Oracle APEX is served using the APEX Listener, via GlassFish 4.

Download and read the Patch Set Notes

First things first, read up on the patch set notes here.

Download and unzip the Patch Set

Next, the patch set is downloaded via Oracle Support.

The downloaded patch set is then extracted.

[oracle@server ~]$ unzip p17966818_425_Generic.zip

Backup database

The database is backed up as a precaution if the patch is unsuccessful.

I prefer a cold and consistent backup to ease the recovery process.

[oracle@server ~]$ rman target / nocatalog

Recovery Manager: Release 11.2.0.2.0 - Production on Fri Apr 25 09:38:09 2014

Copyright (c) 1982, 2009, Oracle and/or its affiliates.  All rights reserved.

connected to target database: XE (DBID=2709648321)
using target database control file instead of recovery catalog

RMAN> shutdown immediate

database closed
database dismounted
Oracle instance shut down

RMAN> startup mount

connected to target database (not started)
Oracle instance started
database mounted

RMAN> backup database plus archivelog;

RMAN> alter database open;

database opened
RMAN> exit

Recovery Manager complete.

Prevent access to the APEX instance

No users should be using the APEX installation while it is being upgraded.  Access to the instance should be limited.  In this particular case, since APEX is served by the APEX Listener which is hosted by a GlassFish instance, user access is prevented by shutting down the GlassFish instance.

[oracle@server ~]$ sudo service glassfish4 stop
Shutting down glassfish4: Waiting for the domain to stop ...
Command stop-domain executed successfully.
                                                           [  OK  ]

The above command is used to control the GlassFish installation only if the corresponding service init script has already been correctly created.  An example on how this is done can be found here.

Apply the patch set

Now, set the current directory to the patch directory, and apply the patch.

[oracle@server ~]$ cd patch
[oracle@server patch]$ sqlplus / as sysdba

SQL*Plus: Release 11.2.0.2.0 Production on Fri Apr 25 09:38:45 2014

Copyright (c) 1982, 2011, Oracle.  All rights reserved.

Connected to:
Oracle Database 11g Express Edition Release 11.2.0.2.0 - 64bit Production

SQL> @apxpatch.sql

The patch will now be applied, and the process will take a few minutes.

Copy patch directory contents into APEX directory

After the patch process is completed, it is time to copy the contents of the patch directory into the original APEX installation directory.

[oracle@server patch]$ cp -R * /path/to/apex/

This will include the images directory as well, and if the path to the APEX directory is the same one used to originally create the images WAR file, the WAR file need not be recreated.

Restart GlassFish

The final step is to restart the GlassFish instance.

[oracle@server ~]$ sudo service glassfish4 start
Starting glassfish4: Waiting for domain1 to start .....................................................
Successfully started the domain : domain1
domain  Location: /home/gfish/glassfish4/glassfish/domains/domain1
Log File: /home/gfish/glassfish4/glassfish/domains/domain1/logs/server.log
Admin Port: 4848
Command start-domain executed successfully.
                                                           [  OK  ]

Now the APEX installation is successfully updated to version 4.2.5, and is ready to be accessed.
Upgrade Oracle APEX from 4.2.3 to 4.2.4

Introduction

Oracle recently released version 4.2.4 of its Application Express (APEX) software.  This post is to document how to upgrade Oracle APEX from 4.2.3 to 4.2.4.

The Oracle APEX installation to be upgraded has the following specification:

  1. The operating system of the server is CentOS 6.5.
  2. The Oracle Database version is Oracle XE 11gR2.
  3. Oracle APEX is served using the APEX Listener, via GlassFish 4.

Download and read the Patch Set Notes

First things first, read up on the patch set notes here.

Download and unzip the Patch Set

Next, the patch set is downloaded via Oracle Support.

The downloaded patch set is then extracted.

[oracle@server ~]$ unzip p17607802_424_Generic.zip

Backup database

The database is backed up as a precaution if the patch is unsuccessful.

I prefer a cold and consistent backup to ease the recovery process.

[oracle@server ~]$ rman target / nocatalog

Recovery Manager: Release 11.2.0.2.0 - Production on Tue Jan 7 12:33:41 2014

Copyright (c) 1982, 2009, Oracle and/or its affiliates.  All rights reserved.

connected to target database: XE (DBID=2709648321)
using target database control file instead of recovery catalog

RMAN> shutdown immediate

database closed
database dismounted
Oracle instance shut down

RMAN> startup mount

connected to target database (not started)
Oracle instance started
database mounted

RMAN> backup database plus archivelog;

RMAN> alter database open;

database opened
RMAN> exit

Recovery Manager complete.

Prevent access to the APEX instance

No users should be using the APEX installation while it is being upgraded.  Access to the instance should be limited.  In this particular case, since APEX is served by the APEX Listener which is hosted by a GlassFish instance, user access is prevented by shutting down the GlassFish instance.

[oracle@server ~]$ sudo service glassfish4 stop
Shutting down glassfish4: Waiting for the domain to stop ...
Command stop-domain executed successfully.
                                                           [  OK  ]

The above command is used to control the GlassFish installation only if the corresponding service init script has already been correctly created.  An example on how this is done can be found here.

Apply the patch set

Now, set the current directory to the patch directory, and apply the patch.

[oracle@server ~]$ cd patch
[oracle@server patch]$ sqlplus / as sysdba

SQL*Plus: Release 11.2.0.2.0 Production on Tue Jan 7 16:07:39 2014

Copyright (c) 1982, 2011, Oracle.  All rights reserved.

Connected to:
Oracle Database 11g Express Edition Release 11.2.0.2.0 - 64bit Production

SQL> @apxpatch.sql

The patch will now be applied, and the process will take a few minutes.

Copy patch directory contents into APEX directory

After the patch process is completed, it is time to copy the contents of the patch directory into the original APEX installation directory.

[oracle@server patch]$ cp -R * /path/to/apex/

This will include the images directory as well, and if the path to the APEX directory is the same one used to originally create the images WAR file, the WAR file need not be recreated.

Restart GlassFish

The final step is to restart the GlassFish instance.

[oracle@server ~]$ sudo service glassfish4 start
Starting glassfish4: Waiting for domain1 to start .....................................................
Successfully started the domain : domain1
domain  Location: /home/gfish/glassfish4/glassfish/domains/domain1
Log File: /home/gfish/glassfish4/glassfish/domains/domain1/logs/server.log
Admin Port: 4848
Command start-domain executed successfully.
                                                           [  OK  ]

Now the APEX installation is successfully updated to version 4.2.4, and is ready to be accessed.
Start GlassFish 4 automatically on CentOS 6

Introduction

The purpose of this post is to document how to start GlassFish 4 automatically whenever the server it is installed in reboots.

The VPS that is hosting my Oracle APEX installation rebooted without warning the other day (as should be expected of cheap services), which required me to personally SSH into the server to restart GlassFish.

The prospect of having to manually restart GlassFish every time the server reboots does not look appealing to me.  I need to find a way to make GlassFish start automatically on boot.

Using GlassFish create-service command

Run the command

The GlassFish 4 Administration Guide Page 3-13 clearly recommends the use of the built-in command called create-service in order to automatically start GlassFish when the server boots up.

Let’s try and see it in action.

[root@server ~]# $GLASSFISH_DIR/bin/asadmin
Use "exit" to exit and "help" for online help.
asadmin> create-service
Found the Linux Service and successfully uninstalled it.
The Service was created successfully. Here are the details:
Name of the service:domain1
Type of the service:Domain
Configuration location of the service:/etc/init.d/GlassFish_domain1
User account that will run the service: root
You have created the service but you need to start it yourself.  Here are the most typical Linux commands of interest:

* /etc/init.d/GlassFish_domain1 start
* /etc/init.d/GlassFish_domain1 stop
* /etc/init.d/GlassFish_domain1 restart

For your convenience this message has also been saved to this file: $GLASSFISH_DIR/glassfish/domains/domain1/PlatformServices.log
Command create-service executed successfully.
asadmin> exit
Command multimode executed successfully.

Attempt to start GlassFish service

It seemed that the command completed successfully.  Now let’s try to start the service.

[root@server ~]# /etc/init.d/GlassFish_domain1 start
[root@server ~]# /etc/init.d/GlassFish_domain1: line 54: $GLASSFISH_DIR/glassfish/lib/nadmin: Permission denied

Something is wrong in the script somewhere.  Let’s examine the contents of the init script created by the create-service command.

[root@server ~]# vi /etc/init.d/GlassFish_domain1

Review lines 50 to 64:

ASADMIN="$GLASSFISH_DIR/glassfish/lib/nadmin"

case "$1" in
start)
    $ASADMIN start-domain    --domaindir $GLASSFISH_DIR/glassfish/domains  domain1 &
    ;;
stop)
    $ASADMIN stop-domain   --domaindir /$GLASSFISH_DIR/glassfish/domains  domain1 &
    ;;
restart)
    $ASADMIN restart-domain   --domaindir $GLASSFISH_DIR/glassfish/domains  domain1 &
    ;;
*)
    echo "usage: $0 (start|stop|restart|help)"
esac

The path to the asadmin command is wrongly set in the script.  The correct path should be $GLASSFISH_DIR/bin/asadmin.  Changing this to the correct path should rectify the error.

Modify the script

Change line 50 as follows:

ASADMIN="$GLASSFISH_DIR/bin/asadmin"

Start GlassFish service

The GlassFish server can now be started using the modified script.

[root@server ~]# service GlassFish_domain1 start
[root@server ~]# Waiting for domain1 to start .........................
Successfully started the domain : domain1
domain  Location: $GLASSFISH_DIR/glassfish/domains/domain1
Log File: $GLASSFISH_DIR/glassfish/domains/domain1/logs/server.log
Admin Port: 4848
Command start-domain executed successfully.

Restart GlassFish service

The GlassFish server can also be restarted by the script.

[root@server ~]# service GlassFish_domain1 restart
[root@server ~]# Successfully restarted the domain
Command restart-domain executed successfully.

Stop GlassFish service

Last but not least, the script can stop the GlassFish domain.

[root@server ~]# service GlassFish_domain1 stop
[root@server ~]# Waiting for the domain to stop
Command stop-domain executed successfully.

Start GlassFish 4 automatically on reboot

In addition to creating the init.d script, the asadmin create-service command also creates symbolic links inside the rc*.d folders, which makes GlassFish start automatically on runlevels 3,4 and 5.

Problems with the script

Although the script created by the asadmin create-service command is functional, I am not quite satisfied with it for the following reasons:

No chkconfig support

Other scripts in the init.d folder can be managed via the chkconfig command.  You can set which runlevels you want to run your service in using this command.  However, the script created using the asadmin create-service command is not compatible with chkconfig.

[root@server ~]# chkconfig GlassFish_domain1 --list
service GlassFish_domain1 does not support chkconfig

No status checking

Other scripts in the init.d folder use the status operand to check the running status of the service.  For instance, for the Apache web server:

[hnizam@server ~]$ sudo service httpd status
httpd (pid  13365) is running...

Unfortunately, the script provided by the asadmin create-service command does not include the definition for the status operand.

[root@server ~]# service GlassFish_domain1 status
usage: /etc/init.d/GlassFish_domain1 (start|stop|restart|help)

GlassFish runs under root user

Finally, the way the script created by the asadmin create-service command is written makes GlassFish run under the root user ID.

If you installed GlassFish under a non-root non-privileged user, and wants the GlassFish process to run under this user ID, the script will not do this for you.

Conclusion

To start GlassFish 4 automatically every time the server boots up, you can use the asadmin create-service command.  However, on Centos 6 at least, the script created by the command will not work out of the box.  Some modifications need to be done on the script before it will work as intended.

GlassFish 4 cannot do SSL for multiple virtual hosts

I have been trying to get SSL working on GlassFish, when I realised that unlike Apache (where the SSL configuration can be defined in the virtual host block), the SSL settings for GlassFish is attached to the network listener, not the virtual host.

In the case of a default GlassFish OSE 4.0 installation, the network listener http-listener-2 is the SSL listener, and only one certificate can be associated with the listener at any one time.  The default certificate given to http-listener-2 is a self-signed certificate given the alias s1as.  Changing this to a CA-signed certificate is a matter of modifying the keystore file using the Java keytool program, and changing the certificate alias used by the network listener (via the SSL tab on the network listener configuration page).

I wanted to host multiple virtual hosts, each using a different SSL certificate as they have different domains, on GlassFish.  I wondered why one listener can only use one SSL certificate, because on Apache each virtual host block can house its own SSL settings and hosting multiple SSL sites is definitely possible (I tried).

So I began scouring the documentation and found this in the GlassFish 4.0 Security Guide:

Name-based Virtual Hosts Using name-based virtual hosts for a secure application can be problematic. This is a design limitation of the SSL protocol itself. The SSL handshake, where the client browser accepts the server certificate, must occur before the HTTP request is accessed. As a result, the request information containing the virtual host name cannot be determined prior to authentication, and it is therefore not possible to assign multiple certificates to a single IP address.

If all virtual hosts on a single IP address need to authenticate against the same certificate, the addition of multiple virtual hosts probably will not interfere with normal SSL operations on the server. Be aware, however, that most browsers will compare the server’s domain name against the domain name listed in the certificate, if any (applicable primarily to official, CA-signed certificates). If the domain names do not match, these browsers display a warning. In general, only address-based virtual hosts are commonly used with SSL in a production environment.

Okay, so it seems like GlassFish is blaming the SSL protocol for not being able to use different certificates for different virtual hosts.  The explanation makes sense though; the server will need to know from the client the name of the virtual host the client is connecting to, but this exchange will also have to be encrypted using SSL.  But which SSL certificate should the server use for this initial exchange?  The problem is understandable.

However, if the problem is the SSL protocol, shouldn’t all web servers behave the same way?  If it is impossible on GlassFish, how come it is possible on Apache?

I did some more digging, and stumbled on an Apache wiki page which stated:

As a rule, it is impossible to host more than one SSL virtual host on the same IP address and port. This is because Apache needs to know the name of the host in order to choose the correct certificate to setup the encryption layer. But the name of the host being requested is contained only in the HTTP request headers, which are part of the encrypted content. It is therefore not available until after the encryption is already negotiated. This means that the correct certificate cannot be selected, and clients will receive certificate mismatch warnings and be vulnerable to man-in-the-middle attacks.

I find it quite weird that the Apache documentation is agreeing in saying that it is impossible because I am sure it worked when I tried it.  This very blog is running on a multiple-certificate SSL server!

Then I clicked on the link on that wiki page that leads to another wiki page, which has the answer: Server Name Indication (SNI).

Apparently, SNI is an extension to the SSL protocol that was introduced in 2006 which allowed virtual hosts to use different SSL certificates and the Apache version that I use has already included SNI inside its SSL implementation.

Before SNI, one IP address and port combination can only use one SSL certificate. The introduction of SNI lifted this limitation of the SSL protocol.  So let’s get back to GlassFish.  Does it support SNI?  Based on the documentation, no.  Why doesn’t it support SNI?  Let’s find out.

Googling GlassFish SNI brought me to an interesting post by Ricardo Martín Camarero.  His encounter with SNI is the opposite of mine; he knew it was not supposed to be possible until someone told him otherwise.  He made me realise through his post that since GlassFish runs on Java, SNI support will be dependent on the Java VM.

As of the current version of Java, which is version 7, SNI implementation is only supported for clients i.e. Java clients will be able to connect to servers utilizing SNI with no certificate errors.

SNI support for servers will be added to Java 8.  As such, we might have to wait until the next version of GlassFish to use SNI.

Installing GlassFish Server Open Source Edition 4.0 on CentOS 6.4

I have been reading up on Oracle APEX Listener, and I want to try using it to serve Oracle APEX instead of the Embedded PL/SQL Gateway (EPG).  EPG is the default option for the APEX that is included in Oracle Database XE; it works, but many of the features of APEX like RESTful services cannot be used with it.

Oracle APEX Listener must run on top of an application server, and the only supported servers are Oracle WebLogic and GlassFish Server.  Since WebLogic costs money, the free way to try APEX Listener is by first installing GlassFish Server.

This post is intended to document the process of installing GlassFish 4.0 server on CentOS 6.4.

Let’s start with a minimal CentOS 6.4 installation.

Then, install Java SDK by going to the Java SDK Download Page (via a desktop, as wget won’t work) and copying the rpm over to the server.  Proceed with installation of the rpm.

# rpm -Uvh jdk-7u25-linux-x64.rpm

After that, grab the GlassFish Server Open Source Edition installer from the GlassFish Server website.

# yum install wget
# wget http://download.java.net/glassfish/4.0/release/glassfish-4.0-unix.sh

The installer chosen above is a graphical installer (there are other install options, which will not be covered in this post), so we will need to install x11 and configure forwarding with SSH.

# yum install xorg-x11-xauth xorg-x11-utils

Ensure the hostname of the server can be resolved via DNS (the installation will flag errors during the config stage if the server hostname is not resolvable.

# hostname
host.domain.tld

# ping host.domain.tld

Login again via SSH and enable X11 forwarding, and run the installer.

# sh glassfish-4.0-unix.sh
Extracting the installer archive...
Extracting the installer runtime...
Extracting the installer resources...
Extracting the installer metadata...

Welcome to GlassFish installer

Using the user defined JAVA_HOME : /usr
Entering setup...
SwixML 1.5 (#144)

The graphical installer will then load.

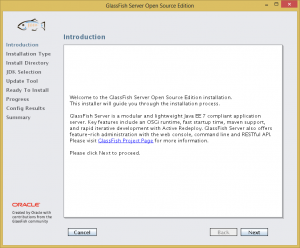
GlassFish Install 1 - IntroductionClick Next.

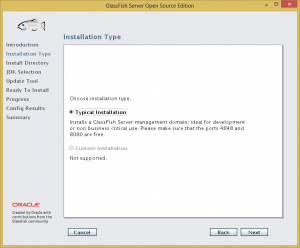
The next page is supposed to give a choice of installation type, but only one type (Typical Installation) is available.

GlassFish Install 02 - Installation TypeClick Next.

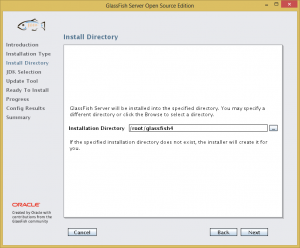
In the next page you can specify the directory in which you wish to install GlassFish Server Open Source Edition.  The default directory is ~/glassfish4.

GlassFish Install 03 - Install DirectoryI will accept the default.  Click Next.

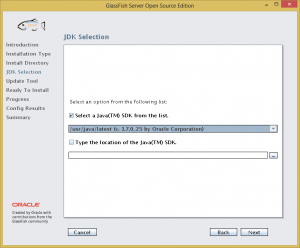
The next page is the JDK selection page.

GlassFish Install 04 - JDK SelectionThe installer has detected correctly the JDK which was installed earlier.  There is an option to type in another custom location of any JDK you want to use instead.  Click Next.

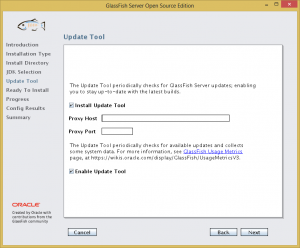
Next comes the update tool page.  The installer will install an update tool that will check for GlassFish Server updates.  You can uncheck this if you want.

GlassFish Install 05 - Update ToolI will leave it installed.  Click Next.

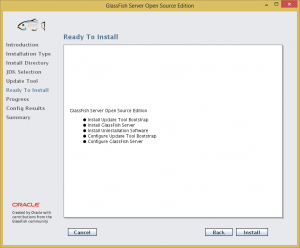
Then comes the summary page before finalising the install.

GlassFish Install 07 - Ready to InstallClick Install.

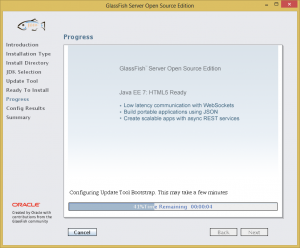
Installation will then begin.

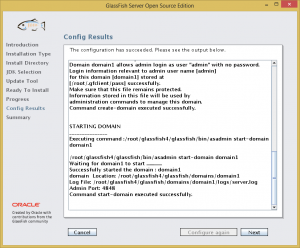
GlassFish Install 08 - ProgressAfter the installation has finished, the installer will perform some configuration, and the next page will show the configuration results.

GlassFish Install 09 - Config ResultsTake note of the Admin Port.  In this case it is 4848.  Click Next.

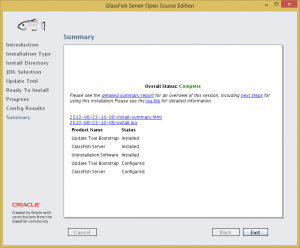
Finally, the installer will show a summary of the installation.

GlassFish Install 10 - SummaryClick Exit to close the installer.

By default, the GlassFish console running on the Admin Port (4848 as noted during the installation) will not accept remote connections.  Therefore, we have to run a browser from the server itself.

# yum install firefox
# dbus-uuidgen > /var/lib/dbus/machine-id
# firefox

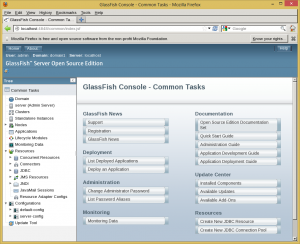
Key in localhost:4848 to the address bar, and the GlassFish console will load!

GlassFish Install 11 - GlassFish ConsoleGlassFish Server Open Source Edition is now ready to be used.


Update 30 August 2013 – Securing the Admin Port

It turns out, to enable remote access to the GlassFish Console is easy.  Just use the enable-secure-admin command:

# /root/glassfish4/bin/asadmin enable-secure-admin
remote failure: At least one admin user has an empty password, which secure admin does not permit. Use the change-admin-password command or the admin console to create non-empty passwords for admin accounts.
Command enable-secure-admin failed.

The command failed because the default password for the GlassFish Console admin is blank.  We need to set it to a non-blank password before enabling secure admin.

# /root/glassfish4/bin/asadmin change-admin-password
Enter admin user name [default: admin]>
Enter the admin password>
Enter the new admin password>
Enter the new admin password again>
Command change-admin-password executed successfully.

Now try the enable-secure-admin command again.

# /root/glassfish4/bin/asadmin enable-secure-admin
Authentication failed with password from login store: /root/.gfclient/pass
Enter admin password for user "admin">
You must restart all running servers for the change in secure admin to take effect.
Command enable-secure-admin executed successfully.

Restart the domain for the changes to take effect.

# /root/glassfish4/bin/asadmin stop-domain
Waiting for the domain to stop .
Command stop-domain executed successfully.

# /root/glassfish4/bin/asadmin start-domain
Waiting for domain1 to start ............................
Successfully started the domain : domain1
domain  Location: /root/glassfish4/glassfish/domains/domain1
Log File: /root/glassfish4/glassfish/domains/domain1/logs/server.log
Admin Port: 4848
Command start-domain executed successfully.

Don’t forget to open up port 4848 at the firewall.

# iptables -I INPUT 5 -m state --state NEW -p tcp --dport 4848 -j ACCEPT

Now the GlassFish Console is accessible outside of localhost.  Key in hostname:4848 in the address bar of your browser, and you will be presented with the GlassFish Console login page.  Your browser might throw a certificate error due to the self-signed certificate; just ignore this and add an exception.

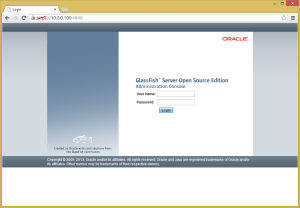
GlassFish Install 12 - GlassFish Console Login PageUser Name should be ‘admin’ and the password will be the password you keyed in during the change-admin-password command earlier.